Showing posts with label Gardening. Show all posts

Friday, March 15, 2013

From Floods to Slugs... Garden challenges on a North Atlantic island


Bill Mollison, the founder of Permaculture, has said to wait a year getting to know your land before you do anything on it. There is a lot of wisdom in this idea. However, I have yet to follow it. It is not that I disagree, but with my current life, I have moved every 2-4 years for the past 17 years! Oh, I am ready to settle down in one place in put down some roots!

So, while I agree with this idea, I have chosen to ignore it for now. I want to get a garden in as soon as possible in each new place I live. Especially when I am only there for two years. There are challenges in doing this though. The biggest challenge is not knowing the weather cycles. In many places, I could look up very accurate weather histories, so I could plan my gardening year. Here in the Azores, and at my previous home in Turkey, well... not so much.

 
My current case in point is the non-stop rain and wind over the last week and a half. We had a beautiful day here last Saturday. I spent a large chunk of the day in the garden getting some of my seedlings in the ground. The following day, the wind and rain started. It hasn't really stopped since. We have been extremely fortunate not to be effected by the flooding, but just two villages away, only a few minutes drive, they were not so lucky. You can see in these photos the destruction that took place.

For me to complain about my garden when this is going on so close would be insensitive and frankly ridiculous. It doesn't mean I am not frustrated about the wind that has decimated about half the seedlings I planted. It doesn't mean I am not frustrated about the slugs that are active twenty-four hours a day for the last seven days because the sun has not come out and the ground stays perfectly wet for them and has given them the opportunity to eat holes in many of the remaining seedlings that were planted. I am not exagerating when I say I pulled off over fifty slugs from my two small garden beds in ten minutes after I got home from work. I can be frustrated about these things and still not complain... not to be some pious martyr, but because it is possible to be frustrated yet keep things in perspective.

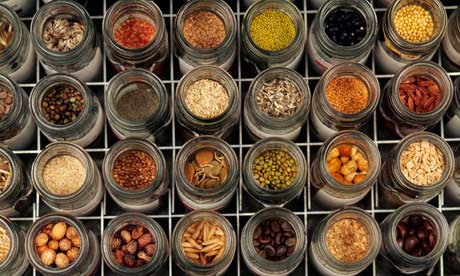
But the entire time I was doing this, I kept thinking to myself two things. First, "this is the reason Bill Mollison says to wait for a year to do anything." I have spoken with the locals about when Spring really arrives, and I get a different answer from each person with whom I speak. Nothing beats firsthand experience. This is the joy of learning while gardening. Yes it can be frustrating and downright disheartening at times. However, my gardening is an adjuct to my daily meals. My life, and my family's life doesn't depend on it now. Let me practice and make as many mistakes as I can right now, so that I can learn. So that if I ever do need to depend on my garden for food, I will have that much more experience.

 
The second thing I kept thinking was, "why am I the fortunate one who gets to pick slugs off his seedlings, when just one town away, people are picking through the mud to find any of their belongings?" Fortunately, there has been a well-organized relief effort which we have been able to contribute to in a small way. Natural disasters are awful, but when we are not directly effected, they should serve as great tools to remind us of our own blessings.

It is always good to get some perspective.

Sunday, March 10, 2013

A Mini Guild: Beans, Cucumbers, Bougainvillea, Stinging Nettle


Seedlings of Purple Podded Pole Bean (left) and Japanese Climbing Cucumber (right)

My boys (age 4 years and almost 5 years old) wanted to help me in the garden this weekend.  I decided to try a small experiment. I have a spot that gets a few hours of morning sun, and that is it. It is not an ideal location for typical garden vegetables, but I only have a couple of seedlings to lose if it doesn't work.

There was a mixed variety of plants growing under a rather old Bougainvillea: some perennial flowering bulbs that the landlord (or their gardener) planted years ago, a low-growing mat of wispy little-leaved plants, a few shoots of ferns, and a single, small Stinging Nettle. I cleared a spot, and my boys and I planted the seedlings. I left the bulbs and Stinging Nettle. I shredded the other unknown plant and used it as a mulch for the seedlings.

My thought is that if there is enough light there for these plants to survive, then we just created a mini-Permaculture Guild. The bean is a legume and is a nitrogen-fixing plant... it will provide nitrogen (not a lot, but some) for the fast growing cucumber. The cucumber and bean are both climbing plants. They can be trained to grow up the tall Bougainvillea, which will be putting out beautiful blooms later in the Summer close to when the cucumber and beans will be ready to harvest. The flowering bulbs are pretty and will provide a bit of ground cover until the seedlings are taller. The Stinging Nettle is small, but by cutting out the competing ground cover around it, I have given it room to grow. As it does, it will become a ground cover of its own with edible leaves. When the Stinging Nettle gets a bit too big, which they usually do in places you don't specifically want them, I will cut it back and use its leaves... young leaves to eat and old leaves as mulch. Since Stinging Nettle is a Dynamic Accumulator, its mulch is rich in nutrients, specifically potassium, calcium, sulfur, copper, iron, and sodium. 

Seedlings (left), Bougainvillea (back), Stinging Nettle (lower right)

This small patch of soil is now home to a small Permaculture Guild. Our yard is full of very pretty, but not very useful plants. However, this spot with a big, old Bougainvillea with its understory of flowering bulbs, when neglected for a few years so that a few "weeds" spring up, and with the addition of a few annual vegetables, now becomes a very productive spot that requires minimal maintenance. 

This is a tiny glimpse of home-scale Permaculture!

Tuesday, March 5, 2013

Permaculture Tip: Perennializing Annual Vegetables - Leeks

The leek is an "annual" vegetable that we may be able to make perennial.

Leeks are one of my favorite vegetables. They are kind of like a mix between an onion and garlic in flavor, a mix of onion and scallion and shallot in use, and a mix of scallion and maybe cabbage in texture. They offer a great flavor addition to many dishes, and I use them quite a bit.

Leeks are biennial plants. This means that they will grow for a full season, winter over, and then flower the next season. Leeks can be harvested whenever you want them. When younger, they are more tender and can be used a bit more like a shallot. When they are older, the leaves are a bit tougher, and they can be used like large onions or almost like cabbage.

I have bought leeks from the grocery store that still had a bit of the roots left on them. I chopped the lower 2-3 inches off (10-15 cm) and let it sit in a jar of water for a few days, then I planted them in the garden. Be warned that this water starts to stink very quickly. I actually do not think this step is necessary, but I have always been too busy to plant them right away. I know it will be a day or two before I will go outside and take the time (okay, it is about one minute!) to plant them, so I stick them in the water. I have left the leek "bulbs" in the water for up to a week. Within a few weeks of planting them in the soil, there are new shoots growing from the center.

This is also a great way to short-cut planting leeks from seeds.

My thought was that this technique could be indefinitely perpetuated. However, I have not lived in a place long enough to test this theory more than a two seasons. But then I listened to an old Permaculture course taught by Bill Mollison, the founder of Permaculture. He had a recommendation that cut out a few of my steps. When a leek is ready to be harvested, instead of pulling the whole plant out, just cut it off at ground level. Then let the plant keep on growing... just as if you harvested it and then replanted the root end.

Perennial Leeks! Fantastic!

If you live in an area that freezes, you can overwinter the leeks by covering them with straw or grass clippings, then in Spring just uncover the mulch. The only concern is that after overwintering, the leek may bolt sooner, but you may be able to stop it by cutting off the flower stalk before it grows too large. I need to experiment with this. I will let you know what I find. If you have done this, please let us know!

Permaculture Tip is an idea that is derived from observing and interacting with nature.  It is simple.  It is safe.  It is effective.  It helps build a sustainable system of agriculture and life in general.  If you have any Permaculture Tips you would like to share, please let me know.  I will post it here, give you the credit, and post a link to your blog or website if you have one.  Email me here: kitsteiner@hotmail.com


Thursday, February 28, 2013

Product Review: Carts Vermont Garden Cart

Carts Vermont

I used to have a wheelbarrow. Well, actually, I used to have multiple wheelbarrows. I would have one for a few seasons and something would break, or rust, or the tire would go flat. I would fix it and use it for as long as possible before it finally broke to a point beyond repair.

But that was when I bought things that were cheap in an attempt to save money. What I realized was that I ended up spending more in the long run to replace the cheap item over and over again. I also realized that I was contributing to the "throw away" society which I am so against. Now, I take my time, research products, and buy quality products from quality companies.

When I moved here to the Azores and had some space to garden, one of the first things I purchased was a Carts Vermont garden cart. I have not regretted this purchase once.

Quality. Sturdy. Useful.

These are the three words I would use to descibe my Carts Vermont garden cart. We use this cart a few times a week to haul trash to the dumpster about a hundred yards from our house, and we use it about once a week to haul our recycling to the recycling bins a few blocks away. I did actually use it as it was intended, in my garden, last Autumn, and I plan to use it again this Spring.

It is truly one of the most useful tools we have in our garage. It saves us time from having to make multiple trips. It saves our backs from lifting too much. It is way easier to use than the wheelbarrow, which was a hassle to use. With two large wheels, there is no wobbling or tipping of the cart when walking. With contact at four points when left alone, it is very stable even on uneven ground. With a flat surface in the cart, there are almost no items that tip out of the cart.

The materials used to build this are strong. Of course, if I was dropping boulders on it, it would break, but this cart is so much more study than those cheap wheelbarrows I used to buy. This cart will last a long time. And, I love this, I can buy replacement parts easily from their website. The cart comes unassembled, and my boys and I put it together one evening. It was easy. So I know that replacing a part, if it should break, will be just as easy.

With that said, I don't think I'll be needing to replace any parts any time soon. The entire cart is made of high quality, durable metal and wood. The design is excellent.

Needless to say, I am a huge fan of my Carts Vermont garden cart. I have the midsize cart, and I love it. If you are looking for a high quality, durable, and useful cart, I don't think you can do better than Carts Vermont.


Tuesday, February 19, 2013

I fell in love with a hoe!

A Peasant Young Girl With a Hoe
Jules Breton, 1882

Although my parents have become quite good at producing a lot of vegetables in their garden now, I was not raised by gardeners or farmers. As a kid, the only thing I ever used a hoe for was mixing concrete. Over the years, as I have gotten more and more into gardening and Permaculture, I have used my garden hoe on occasion. To be honest, I hated it. It was so much work to do anything. My cheap, mass produced garden hoe has been sitting with my shovels and rakes for a few years now. All the other tools are taken out on a fairly regular basis, but not the hoe. It has remained on the bench while all the other tools have had a chance to play.

Over this past weekend I noticed that my garden beds were getting quite a few small weeds growing in them. I thought about how long this would take to hand weed. I thought, "Well, people have been using garden hoes for centuries or more for this job. I may as well try it as well."

On a seemingly unrelated note, I am now living in a place the has a fireplace which we have used everyday this Winter. I have been splitting wood and making kindling for a few months. It wasn't until I finally purchased a high quality ax that I realized how poor little hatchet really was. I am planning on discussing that soon in another article, but the hatchet I had was poorly constructed and dull. Very dull. After using a razor sharp ax, the chore became enjoyable.

So, I grabbed my garden hoe, and I looked at it. I mean I really looked at it. It dawned on me that this is a chopping tool. Things that chop, like a knife or an ax, need to be sharp. I checked the blade of the hoe, and it looked like every other hoe I have ever used. Dull. I grabbed my metal file, sat on the handle, and sharpened the blade of my hoe. It took a whole five minutes. Then I headed to the garden.

To say that this was an epiphany would not be exaggerating. I weeded the garden bed in less than ten minutes. I was standing the whole time; my back didn't get sore. The entire time, I kept thinking to myself, "How could I have never known?" Sharpening the blade of the hoe suddenly made this stick with a hunk of metal on it a useful tool. It was wonderful. It was easy. It was enjoyable. I fell in love with a hoe!

Then, because my brain never shuts off, as I was repeating to myself, "How could I have never known?" I thought that ancient people from around the world knew this for centuries, and I have to relearn it. Of course this is a minor thing, and many people who use garden hoes never forgot it, but some did. What else has dropped from common sense? What other things have we entirely forgotten?

I thought of ancient cultures that had rich gardening and farming heritages. The Egyptians, the Babylonians, the Chinese, the Japanese... the Japanese did a lot of gardening. The Japanese have a whole variety of hoes. The Japanese also wrote haikus about nature. "How could I have never known?"has seven syllables. I could write a haiku. So here it is:

Sharpen the darned thing!
How could I have never known?
Ancient tool reborn.
Stay tuned for more poetry about garden tools!

Wednesday, February 13, 2013

Spring Garden - Seed Trays are Planted!

Just a quick post to share (and to keep for my own records) what seeds I am starting for this year's Spring garden. As you can see, I am a huge fan of Seed Savers Exchange and heirloom vegetables in general. 

This seasonal transition, and the importance it plays in human life, has greatly been lost in our modern world. To get reconnected to it... to the pleasures of the coming Spring are simple, but profound. Plus, it is always fun to get the seeds planted. I always feel like a kid in a candy store when going through my seed collection to pick out what I want to plant this year.

Well, here is my final selection. I'd love to know what you are planting. Let me know!

Tray 1

Tray 2

Tray 3

Tray 4

Tray 5

Tray 6

Tray 7

Wednesday, January 23, 2013

Questions from Readers: Growing your own tea plants

Camellia sasanqua "Yuletide"

Question:
I am looking into getting a Camellia sinensis to make tea, but I tried to find out if I can make tea out of my Camellia sasanqua. Have you heard of making tea out of other Camellias besides Camellia sinensis?
- Hershal

Answer:
The short answer is yes!

There are up to 250 species of Camellia depending on the botanist who is counting. While the best species for tea is Camellia sinensis, other species can and are used for tea. The more common species used for tea are C. japonica, C. reticulata, and the species you have growing now, C. sasanqua. While these Camellia leaves can be used by themselves (and I would try it by itself for sure), they are typically added to C. sinesis for additional flavor or aroma.

There are a number of varieties of each Camellia species. Many of these, especially in the U.S. were developed for flowers and not for tea. This doesn't mean that you cannot use your leaves, it just means that your leaves may not be as tasty as another variety. I wonder if you know which variety you have. C. sasanqua is most common with pink/red or white flowers, but there are many varieties out there.

Here is a great link to growing and making tea at home from the American Camellia Society.

Here are the Hardiness Zones for the best tea species:

  • C. japonica - Zone 7
  • C. reticulata - Zone 8
  • C. sasanqua - Zone 8
  • C. sinensis - Zone 8


Also, if you are looking for additional uses for your plants, all the Camellia species I named above, as well as a number of others (especially C. oleifera), are used to produce tea seed oil (not to be confused with tea tree oil which is not really edible). The oil is obtained from cold-pressing mature seeds. This is a common cooking oil in China. In some locations, it is the most common cooking oil. It has many of the health benefits of olive oil, but it has I much higher smoking temperature, so it can be used to fry foods as well. Sounds like a pretty great cooking oil to me. Now you've got me wanting to try it!

Finally, I must add that this question was fantastic, because it made me realize/remember that I have a couple C. japonica in my yard right now. I will be trying to make some tea this weekend!

Best of luck. Keep us posted!

John


I have recently been getting more and more questions from readers, and I have tried to keep up and individually respond to all of them. I have been getting a bit behind. Because so many of these questions are really good, I thought I would start sharing them when I get the chance. So please, ask your questions! I'll do my best to give a good answer.

Tuesday, November 27, 2012

Bright Agrotech - Vertical Farming and Aquaponics


The Bright Agrotech team

My good friend's brother has co-founded a grassroots agricultural company seeking to help produce healthy, local, and sustainable food. Awesome! They have a great lineup of products and a great philosophy. Check out their website here: http://www.brightagrotech.com/

If you believe in their mission, and you have some extra cash, consider investing with them. Here is their KickStarter page: http://www.kickstarter.com/projects/569973520/grow-up-vertical-farming-for-everyone


Thursday, November 8, 2012

Trap Plants and Trap Crops

A central row of Buckwheat being used as a trap crop on a large scale.

First, a basic definition. A Trap Plant is used to attract insect pests away from a desired plant. When used on a large, industrial scale, we use the term Trap Crop. Trap Crops are just a larger planting of Trap Plants which protect the main crop from insect predation.

This simple technique has many advantages:
  • Reduces the use of pesticides
  • Protects beneficial insects from pesticide use
  • Provides food for predatory or parasitic beneficial insects
  • Eventually decreases overall pest populations
  • Increases biodiversity
  • Reduces crop loss

Now let’s take a closer look at each of these advantages.

Reduces the use of pesticides
This is fairly straightforward. If you don’t have pests on the fruit or vegetable you are trying to harvest, then you are not going to use a pesticide. I am all for not using any chemicals on my food, whether they be toxic mainstream pesticides or “safe” organic pesticides. If I don’t have to put something on a plant that wouldn’t be there on its own, then that is ideal. If you are a backyard grower who is somewhat committed to an organic garden, then avoiding a pest outbreak in the first place will reduce the temptation of using potentially harmful chemicals on your plants.

Protects beneficial insects from pesticide use
One of many problems with the use of pesticides is that they indiscriminately kill insects, the good along with the bad. By using techniques that reduce or eliminate pesticides, we are preserving the population of beneficial insects.

Provides food for predatory or parasitic beneficial insects
Predatory and parasitic beneficial insects are vastly outnumbered by their prey. Just think of the African savannahs; they are full of wildebeests, zebras, gazelles, and other grazing animals, but there are relatively few lions or cheetahs in comparison. There needs to be a healthy population of prey for the predators to be sustained in the environment. A garden system that has absolutely no pests will certainly not have the beneficial insects which we want. Why would they be there? There is no food for them. But we don’t want our food crops to be hosting the pests either. By providing plants that the pest insects can eat, we are in fact maintaining a food source for the beneficial insects that use the pest insects for food. Since the predators are present in the garden, the pests will have a significantly harder time inflicting damage.

Eventually decreases overall pest populations
Proper use of trap plants involves monitoring the life cycle of the pests. When the trap plant becomes covered in pest eggs or pest caterpillars, it is time for us to intervene. Maybe we cut down the trap plants and bury them in the hottest part of the compost bin. Maybe we put the cut plants covered in pests in the burn pile. Maybe we toss the branches covered in caterpillars in the chicken pen. By intervening at the proper time, we are allowing the pest to expend a large amount of energy on growth or reproduction or both, but not allowing that pest to capitalize on its investment. If almost every time an adult pest lays eggs those eggs never make it to adult stage that can itself reproduce, how many of those pests will continue to be in your garden? Not too many.

Increases biodiversity
By allowing some pests to survive, but away from our food crops, we will encourage more predatory and parasitic beneficial insects into our gardens. Life will never thrive in a vacuum, and in nature a vacuum never lasts. If we try to sterilize our gardens by chemically destroying all pests, we are creating a vacuum of our garden. Without constant vigilance of our garden vacuum, our garden will be overrun the moment we are not looking. Maybe it is a few days of having to work late and not being able to get into the garden or maybe it is a vacation for a long weekend. When we return, we notice that our food crops are covered in caterpillars or, worse yet, we see skeletons of our former plants with no leaves and dozens of fat, happy caterpillars munching on the few remaining bits of green. It has happened to me, for sure. However, by having trap plants and allowing some pests to remain as food for the beneficial insects, we are allowing for the natural increase in biodiversity that will develop in any environmental system.

Reduces crop loss
This is obviously the ultimate goal of trap plants, and it works. It takes observation and planning, but working with nature instead of constantly fighting it is considerably easier, less stressful, and more fun. It is also great for the environment and health of your garden. It is so successful, that many farmers are using this method on a large scale. Reducing crop loss in your own garden is just as effective.


I'll be expanding on this topic more in the next few days with examples of trap plants and ways to use them in your gardens. Stay tuned!

Sunday, October 28, 2012

Picking, and Eating, Tomatoes with my Daughter

My daughter on the rocky shore near our house.
She wants to be outside every chance she gets.

On almost a daily basis, I try to do at least a quick walk through of my garden with my daughter. She is only 15 months old, so the walk through usually consists of my carrying her. I tell her which plants are growing well. I will pick some mint or crush some thyme and let her smell the fragrant leaves. She only has a few words, so most of the conversation is one sided. She does manage a high-pitched, "oooh, oooh, oooh" when she spots a plant at which we normaly stop to examine further. However, since her first taste of a vine ripened cherry tomato a few days ago, she can barely contain her excitement when she realizes we are going anywhere near that plant.
 
We had a lot of roadblocks to a decent tomato harvest this year. The biggest problem was that I moved in the middle of the summer and could not get my seeds in the ground until late August. I only planted a few plants, and a short while after fruit set, Hurricane Nadine came through... twice! The plants were almost entirely shredded by the winds. There was one side of one plant that made it through relatively unscathed. The half dozen small green cherry tomatoes were protected from the wind and are ripening on the vine.
 
These are the tomatoes that my daughter loves. I’ll pick one and take a bite. Then, I’ll give my daughter a bite, but she grabs my hand and tries to eat the rest at once. Well, to be honest, I love them, too. They are tomatoes that taste like tomatoes are supposed to taste. These are tomatoes that remind me that tomatoes are in fact, technically, a fruit. They are sweet. They burst with juice and flavor.
 
We've picked and eaten three of them so far, and now there are only three left. Within a few days, they will be gone. I’ll wait until these fruit are perfectly ripe, and my daughter and I will together savor the last of tastes of summer. I would venture to say that these few tomatoes may be the best tasting tomatoes I have ever tasted… or maybe it is just because of the girl who is eating them with me.

I don't care either way.


Wednesday, October 17, 2012

Permaculture Tip: What to do with Autumn Leaves?


I had a question "from the audience" the other day, and I thought I would share it with my answer.

What would you do with your fall leaves if you were extremely short on time? I just purchased a home and don't have much time to work outdoors before winter sets in. I have a lawn that is covered in both deciduous leaves and conifer needles, but no dedicated garden beds, Permaculture projects, or compost bins going yet. Bottom line: How would you use those leaves to maximize next year's usage?

Short answer:
Save them all!

Long answer:
Loosely pile the leaves and run your lawnmower over them, or put them in a large, plastic garbage can and run your weed eater (a "whipper-snipper" in the UK) like a large kitchen blender. Then pile the leaves in one of two spots. The first location would be an out of the way spot that you may use for future compost bins. The second location would be in the general area where you will want to plant garden beds next year.

A few things to consider...
If your leaves are mostly dried and brown, consider adding some vegetable scraps from your kitchen or fresh lawn trimmings to the leaf pile. Dried leaves are high in carbon, but low in nitrogen. To get them composting well before the cold of winter hits, adding nitrogen-rich material will help. The alternative is also true. If the leaves are all green, then the addition of carbon-rich brown material would speed the composting process. However, there will likely be a mix of both, and these will eventually compost on their own without any help from us. Just like in a forest.

Pine needles take a long time to compost. If you can shred them with the lawnmower, it will help.

Freezing and thawing will help the leaves break up and decompose as well. Make sure there is enough moisture in the pile as you build it (AFTER the leaves are shredded!).

Other Options...
If you have any existing trees or shrubs that you are planning on keeping, you can pile the leaves underneath as natural mulch. Doing this after the leaves are shredded will minimize wind distribution.

If you plan on keeping chickens next spring, consider saving some of the leaves in a dry area. Maybe just piled high and covered with a tarp. These can be used as a deep litter source for a henhouse. A deep litter plan is the only way I would recommend keeping chickens unless they are being pastured. The book that best describes this is The Small-Scale Poultry Flock.

I have also heard of people filling a bunch of garbage bags full of the leaves. The bags were stacked against a poorly insulated wall in a partially-exposed basement wall. This natural insulation dropped the owner’s heating bill. I imagine bags could be placed in attics or crawlspaces as well. They may be viewed as ideal nesting sites for rodents, but they could be removed easily.

A Permaculture Tip is an idea that is derived from observing and interacting with nature.  It is simple.  It is safe.  It is effective.  It helps build a sustainable system of agriculture and life in general.  If you have any Permaculture Tips you would like to share, please let me know.  I will post it here, give you the credit, and post a link to your blog or website if you have one.  Email me here: kitsteiner@hotmail.com


Monday, October 15, 2012

How I Spent My Sunday... Planting my Garden Beds!


I spent a few hours today planting my garden beds. Lots of fun! I did get a little help from Elijah, my 3 year old son.

Here is what I planted today. Almost all were seeds. I'll post some more photos as things start growing.
  • Basil – Genovese
  • Basil – Thai (Siam)
  • Beets – Detroit Dark Red
  • Beets – Burpee’s Golden
  • Beets – Tall Top Early Wonder
  • Broccoli – Romanesco (yeah, some people call it a cauliflower)
  • Brussels Sprout – Long Island Improved
  • Cabbage – Copenhagen Market
  • Cabbage – Red Acre
  • Cauliflower – Purple Cape
  • Cauliflower – Snowball
  • Cauliflower – unknown variety of seed that I saved from my previous garden
  • Dill
  • Garlic – Softneck (grocery store garlic that started to sprout)
  • Garlic – Hardneck (grocery store garlic that started to sprout)
  • Kale – Dwarf Blue Curled
  • Kohlrabi – Early White Vienna
  • Leek – American Flag
  • Leek – Giant Musselburgh
  • Lemongrass
  • Lettuce – Black Seeded Simpson
  • Lettuce – Parris Island Cos (Romaine)
  • Onion – Long Red Florence
  • Onion – Sweet Spanish Yellow Utah Jumbo
  • Onion – Walla Walla
  • Parsley
  • Radish - Watermelon
  • Sage
  • Shallots – Red (grocery store shallots that started to sprout)
  • Spinach - America
  • Swiss Chard – Five Color Silverbeet
  • Turnip – Purple Top White Globe
  • Rosemary

Tuesday, October 9, 2012

My New Garden Beds


My new garden beds about ready for planting! I used free, local, volcanic rock.
In the background, you can see the recycled shipping palett compost bin my father built during his recent trip
 
I thought I would share one of the projects is my garden. I just finished (almost) setting up my garden beds. I just need to plant seeds and seedlings. Very exciting!
 
Those of you in cooler climates may be thinking I am just a bit too late, or way too late, for a Fall garden, but in the Azores, it is perfect planting weather. We are in a maritime subtropical temperate climate. The Winter temperatures never drop below freezing. It is actually a more mild Winter, though more windy, than my previous garden in Turkey (a Mediterranean subtropical temperate climate).  So, I figure I'll be planting all my cool weather crops within the next few weeks, and be enjoying fresh greens and veg through the Winter.

My "Lower Garden". The spot I chose for the first garden beds.
 

I also thought I would share all the reasons I set up the garden beds where and how I did. It may be obvious for those with a lot of gardening experience, but not so for those with minimal time in their own garden. The first decision was location. As I am located just about 100 yards (90 meters) from the rocky, exposed beach, I get a lot of wind. The bougainvillea lining the wall in the photo above were almost decimated from Tropical Storm Nadine during her first and second visit to our island. Fortunately, the patch of earth I call the Lower Garden has pretty good wind protection from the surrounding walls and hedge. It literally sits about 5 feet (1.5 meters) below the rest of the garden, but it has great drainage. Even with the prolonged rain from Nadine, there was no puddling.
 
The next decision to be made was orientation. In the photo above of the Lower Garden, south is to the top of the photo, east is to the left, west is to the right, and I am on the north side taking the photo. This means the sun will progress from left to right (east to west) through the day. By orienting the beds on the north-south axis, the sun will hit both sides of each bed. Taller plants will be planted on the north end so that the southern sun (shining to the north) will hit more leaves, and the taller plants will not shade out shorter plants. Other gardeners run their beds east-west and plant all their taller crops on the north side as well; this is just another way of doing it. Of course, if you are in the Southern Hemisphere, then just switch north and south.
 
Rock walls and grass barrier in place. My Dalmation overseeing the project.

My last decision was how to make the beds. I am a huge fan of raised beds. Do I think they are the only way? By no means, but I think they will work great for my situation. I had a large pile of local volcanic rock piled up in a corner of the garden, and I decided to use these to make the sides of the raised beds. There were a number of reasons for this. First, they were free. Second, they were natural; chemically treated wood is commonly used, but I am not a fan for a lot of reasons. Third, the dark rocks would heat up in the sun which heats up the soil faster and improves the microclimate of the beds. The rocks will also radiate heat at night. I live in a cooler area even though it is not cold, so the additional heat will be nice.

I earned a greater appreciation for the builders of stone walls, because stacking rocks on top of each other in a linear fashion is not nearly as easy as it looks. There was a lot of rearranging and restacking and checking balance and stability. It was actually quite fun, but building a wall more than two layers would require a lot more time and skill.

I chose to line the beds with a number of layers of brown packing paper from our move. I saved as much of it as I could for just this reason, but I also have used it as kindling for fire starting. This will smother the underlying grass, slowly break down over time, and allow the bed plant roots to burrow through this layer and deeper into the soil.

That's it for now. A glimpse into my thinking and creation of my new garden beds.

Oh - these beds are about 4 feet x 12 feet. That's 48 square feet (4.5 square meters) per bed or 96 square feet (9 square meters) total. Not to bad!


Tuesday, October 2, 2012

Harvesting Seaweed

Collecting seaweed from the coast, with my boys and my dog.
 
I have written in previous articles about always being ready to grab what is on hand for your home vegetable garden or forest gardens. With the passing of Hurricane/Tropical Storm Nadine, one of the beaches in my neighborhood became inundated with seaweed. So I went out with my boys, dog, garden cart, bucket, and shovel in tow to the beach. I did wonder how the locals would react to me walking the streets with a large wheeled cart full of seaweed; however, I ended up meeting three groups of people who were collecting seaweed as well in just my brief twenty minute shoveling session . I think they were more surprised that a foreigner was out there with them than I was. 
 
Seaweed is a great compost addition (I'll talk more about that in a day or two). Everyone was gathering it for their gardens, orchards, and vineyards. One local man, in his 60's, told me that he had never seen this much seaweed washed up at one time. The boys loved running in the feet deep seaweed. To them it was like a super-sized trampoline. The dog was acting like it was a field of brown snow. Fantastic memory.
 
 My boys playing on the bed of seaweed.


Wednesday, September 12, 2012

Free E-book on Seed Saving


I wanted to quickly share a website (well two actually, but they are the same organization really) and a free e-book. This is a great organization whose goal is to "grow and steward rare, diverse and resilient seed varieties and distribute these to other ecologically minded farmers, gardeners and seed savers."

They have produced a free, 22-page Guide to Seed Saving that can be downloaded from their site. It is a great tool to help get you started on saving your seeds.  Check it out!

http://www.seedambassadors.org/docs/seedzine4handout.pdf

Tuesday, August 14, 2012

How a Community Fed Itself. Another look at Todmorden

Vegetable beds in front of the Police Station in Todmorden, UK.


Not too long ago, I shared this article about Todmorden, a town growing all its own vegetables. Apparently, I was not the only one who thought this was a revolutionary idea. The TED Conference organization who promotes "ideas worth sharing" hosted Pam Warhurst, the motivating person behind this UK town's gardening revolution. I highly recommend taking the 13 minutes to watch this video. This truly is an idea worth sharing.


Wednesday, August 8, 2012

111 Plants for Your Garden


This is a fun and quick article I found at Organic Authority.com. It is a list of "must have" plants for any kitchen garden. Just about every plant I could think would be mandatory for a list like this is already on it, so I think they did a pretty good job. Take a look. What do you think?

111 Plants for Your Garden

Tuesday, August 7, 2012

Seed Banks

A tiny fraction of the seeds stored in a professional seed bank

No, this is not a building that has replaced dollars with seeds.

A Seed Bank is a location or collection of seeds that are saved as a reserve (stockpile) just in case other seeds and/or plants have been destroyed. There are a number of reasons that individuals and organizations are keeping seed banks, but the most common reasons are the loss of biodiversity or food crops secondary to natural disasters, disease outbreaks, economic collapse, wars, or man-made habitat destruction.
One popular brand of individual seed bank.

Individual Seed Banks
For the individual, there are a number of companies that sell pre-packaged seed banks, and they are sold as “emergency seed banks”, “survival seed kits”, etc. In general, these are a slightly more expensive way to always have some seeds on hand if you ever think you would need them. The big problem that I have with these products is that it often gives a person a false sense of security. Way too many people have bought one of these containers and stored it in the basement, and have never grown a tomato plant in their lives. There are too many “survivalists” that are out there, trying to make sure they are prepared for the end of the world, who have a lot of gear but no skills to use them.

While I was never a Boy Scout, I try to live my life according to the Boy Scout motto, “Be Prepared.” To me, having a large selection of seeds, and the skills to use them to produce food, is what I am constantly striving for. Most years my garden is much smaller than I want it to be, but I am still able to produce food from it. My long-term goal is to be raising a large percentage of my family’s food. I know that will take practice and trial and error. So that is what I am working on now.

If you have the skills to grow your own food, and you have some extra cash, one of these kits may be a nice “just in case” item to have in your larder. Personally, I just have a large box filled with seed packs that I routinely use and replenish as needed. There is a growing section of my own stored seeds that will make my collection even more resilient.

Underground and inside the Kew Millennium Seed Bank

Professional Seed Banks
Now we get in to the large and very large seed banking projects. These seed banks are trying to save as many seeds as possible for all the reasons listed above, and they are doing an amazing job. The largest seed bank in the world is the Millennium Seed Bank Project. It is coordinated by the Kew Royal Botanical Gardens and is situated in West Sussex County, England. They currently have seeds from over 30,000 different species of plants. This represents over 10% of the world’s wild plant species. Astounding!

Their goal is to have 25% by the year 2020, and I think they could probably achieve this. They also perform germination tests on all species every 10 years. This is vital. If the seeds are no longer viable, then storing them is worthless. If the seeds have low rates, they can restock with fresh seeds (if they can). All the seeds are cleaned, packaged, labeled, and stored in below-freezing temperatures in the below ground, nuclear bomb-proof vault. These guys take seed storing seriously.

You can find more about the Millennium Seed Bank Project, adopt a seed, adopt a species, and even tour the facility by visiting their website here.

Tuesday, July 31, 2012

Battling the Dogma of Big Ag

I just wrote another article for AgriTrue. You can read the full article on their site (see link below). You can read more about AgriTrue here... unfortunately we have had some set-backs, but we are still working on making AgriTrue a reality.

Home Extension Agent Canning Demonstration 1932


I just read an article at the Hobby Farms website, Grow Smart: Keep Food Safe. I was frustrated with it for a number of reasons, but the underlying theme of this article was that we should be scared to raise our own food. What better way to keep the food production in the hands of the big agricultural corporations than to instill fear in those of us that would challenge them? I would recommend reading this short article first (follow this link), and then come on back and see what I have to say about it.
The article documents an interview with Roy Ballard, Purdue Extension educator for agriculture and natural resources. The Extension Services were meant to disseminate information to local farmers and home producers to make their lives better. Unfortunately, it seems that they are becoming just another mouthpiece for Big Ag. Here are a few of his quotes and my issues with them:

“It doesn’t matter if you’re a commercial wholesale grower, hobby farmer, home gardener or direct marketer, the risk of food-borne illness is the same and the precautions that need to be taken are very similar.”
Really? Does he really believe that the risk of my eating a handful of blackberries I picked from the canes growing up the wall in my garden with nothing ever sprayed on them and never even being irrigated is the same as eating blackberries imported to the U.S., which were grown in Mexico, grown under who knows what conditions, sprayed with a variety of chemicals, and then shipped to the local grocer, stocked, and sat on the shelf for a few days before being bought? This fails the common sense test, and unfortunately, I think he really believes what he said.

Read the rest of the article here...

Wednesday, July 11, 2012

A Weasel in My Garden!

The Least Weasel (Mustela nivalis)... resident of my garden

During our first week at our new home, I saw this little blur of brown and white fur run out of the garden, spin in a circle, and run right back in. It was too sleek to be a rat, so I asked one of the locals about it. He was standing with two other men, and he was the only one who spoke English, a little. I described what I saw, and he translated to the other two men. The one in the back held up his hands just under a foot (30 cm) apart and raised his eyebrows in question. Yeah, that was about the size of it, I nodded.

"Ah, niñito," he said nodding.
"Ah, niñito, yes," the other two men assuredly nodded as well.

That name seemed a bit familiar. About 10 minutes later, I was rolling my eyes after reading the google definition: Diminutive of niño small child.

This is obviously the local name for the animal. Not helpful.

A little more looking, and I discovered the animal was likely the Least Weasel. It is the smallest member of the Weasel Family (Mustelidae) as well as the smallest member of the Carnivore Order (Carnivora). It is found throughout Europe and on islands in the Atlantic (including ours in the Azores!), the Mediterranean, and Japan. It feeds mostly on rodents, and it can kill and carry an animal up to 10 times its own weight!

Then a few weeks later (a couple of days ago), right at dusk, I was standing on the porch overlooking the garden, when I saw a little furry critter slowly creep out from under the large clump of aloe plants. This clump is about ten feet (3 meters) long by four feet (1.2 meters) wide. He (or she) stepped out, walked around for about 20 seconds, and then scampered back under the aloe. Definitely a Least Weasel. Almost cute.

My first thought when I saw him come out was, "Oh great, these things can kill birds. I want to get some chickens." I wondered if I was going to have to "get rid" of the weasel somehow. But I almost immediately thought of the story of the Bullock brothers.

These three brothers had decided to start a Permaculture project on one of the islands off the coast of northwestern Washington state. They had worked for a few years to restore the flora at the water's edge including planting some "wild" foods that they also enjoyed eating, like cattails. They had a good harvest for a year, and then they noticed that most of their cattails were being raided. They eventually realized it was muskrats. As they had started to restore the land, the animals were coming back, and they were eating some of the brothers' harvest. Instead of trapping them or killing them, they decided to let nature be. For a few years, they continued to lose their cattail harvest. Then one year it seemed that the muskrats were gone. It turned out that now, thanks to a healthy muskrat population, the otters and eagles had moved back to the area, and they were feeding on the muskrats. The brothers were able to harvest some cattails again, but they shared some with the muskrats as well, and a more complex and stable food web and ecosystem was restored.

I have done something similar in the past (see my article: Hold the chemicals... see what happens!), but it was on a much, much smaller scale. However, the priciple is the same.

So, we will see what happens.

The other logical way to look at it is this... If the Least Weasel in my garden eats mice and rats and other rodents, and I have seen mice and rats in my neighborhood and in my neighbors backyard, but I have not seen any of these pests in my house or yard, then this guy is doing me a service. I will not only let him be, but I will welcome his stay.

Now we have a weasel as a neighbor.