
Over the last few days I learned a few valuable lessons.

Antique Ash Bucket from 19th Century England

My Ash Bucket... the fact it says "Homer"on it should have been a clue!
Lesson 1: Never put ashes from a fireplace into anything other than a metal container or you may come really close to starting a house fire.
First, in my defense, I did not grow up in a rural area. I did not grow up in a cold area. I grew up in the sprawling suburbia of southern Florida. We did not have fireplaces. There were a few people who did, but these fireplaces were for show. Heck, there were only a few days a year you could actually light a fire in a fireplace, and then you probably had to open a window due to overheating. The last few months, living on a rainy, windblown island in the North Atlantic in a house with no central heat, we have relied on the fireplace to warm up our living room. And true to its name, this is the room where we have lived the most due to the fireplace and its warmth.
So, back to the lesson... I cleaned out the fireplace a few mornings ago, and just like every other time for the last few months, I placed the ashes into a plastic bucket. I typically carry it outside and dump it in the compost bin. This time, because it was raining and cold and windy, I didn't bring it out right away. In fact, I placed the bucket in a big box where I keep old packing paper that I use for kindling. Later that evening, about 10 hours later, I went upstairs and smelled something burning. It smelled a bit like wood and a bit like plastic. I wasn't really sure. My wife and I walked all around the room trying to locate the smell, but we couldn't locate it. Another hour passed, and I sat down to read, but the smell was stronger. I climbed around the room, smelling receptacles and light sockets. And then I came to the box with the bucket of ashes in it. The smell was really strong in there. I lifted the bucket up, and the entire bottom of the bucket fell off. Strands of melted plastic, like cheese on a pizza, dripped all over. In the center of it all was a big pile of ashes and a few dozen bright orange embers, still very much alive. In fact, my lifting the bucket gave those embers new oxygen and a new life. The paper in the box, now covered with hot embers started smoldering. I carried the box outside to the concrete porch just in time for some of the papers to ignite. Now I see why I always saw metal buckets for ashes in old movies and at historical sites.
House fire barely avoided. Lesson learned.

Giant Reed (Arundo donax) patch near my house.
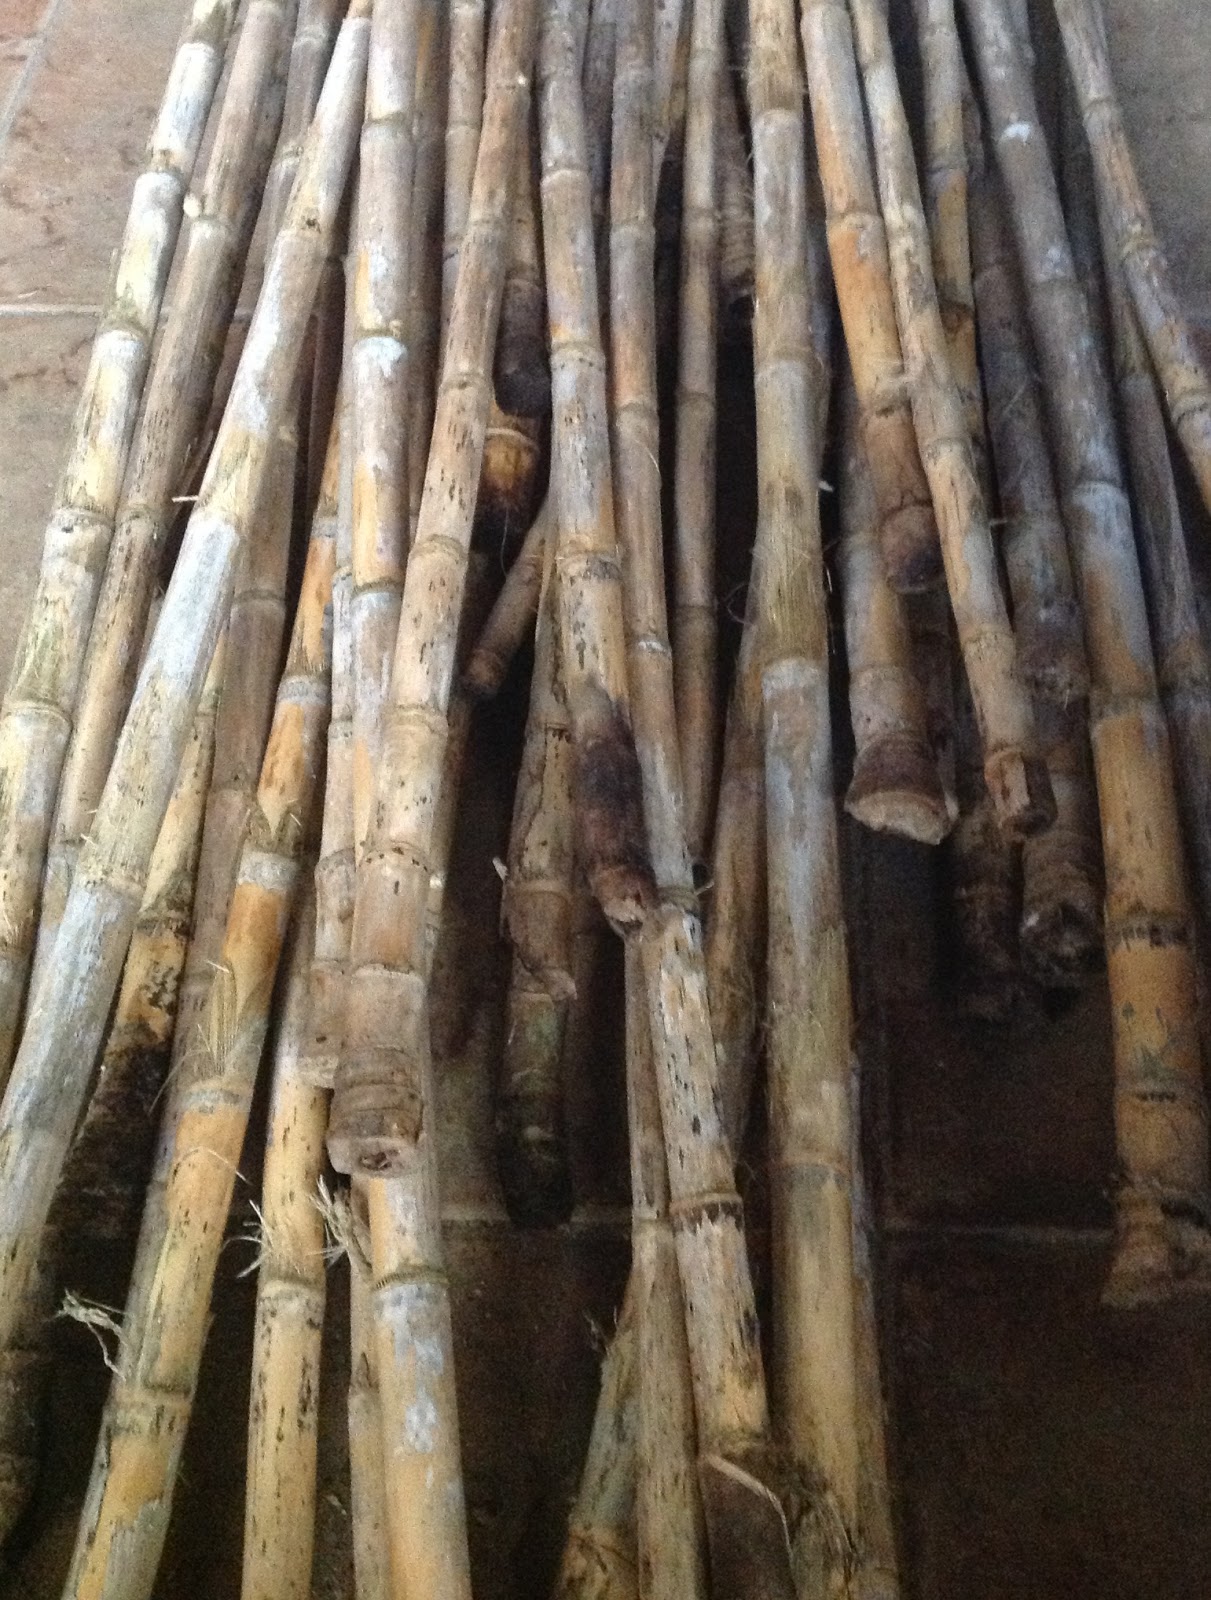
Cleaned and partially dried reeds.
This is a perfect illustration of Permaculture Principle #: Observe and Interact. Within a one minute walk from my front door is a patch of giant reeds. The top photo was taken the past summer. I had been telling myself to go over there for months and get some. Well, fast forward about 6 months, and the patch is only about half green. The cold and wind has killed off most of the reeds. Unfortunately, about half of the dead reeds were blown to the ground and are mostly rotted. Luckily, there were still quite a few in good shape. I grabbed a bunch and brought them back to my house. I cleaned them, stacked them, and I am letting them dry out some more until I need stakes and supports for my Spring and Summer garden. It cost me all of twenty minutes! If I waited another few weeks until after the next big wind storm, I may have missed this opportunity. So the key here is to not just observe, but get off my butt and interact!

My stockpile of kindling, gathered and made.
I have been running out of kindling for the past month. I had a few boxes of kindling that my father had prepared and saved for me this Summer when he visited, but I finally ran out a week ago. Again, I never used a fireplace on a regular basis until now. I had no idea how much kindling I was going to need. For the past week, I have been using all kinds of scraps of wood and cardboard. I have been getting pretty good at starting fires with less and less. In fact, I have been pretty proud of how good I have become at starting roaring fires with almost no kindling. But my meager supplies have been getting pretty thin. Finally, I spent half a day chopping firewood with a hatchet (no, I don't own an axe yet!) into smaller and smaller pieces for kindling. I rather enjoyed the work, but it took quite a while. Then my neighbor told me to use the dried reeds for kindling. "They burn great!" she said. This is what finally got me off my butt to go get the reeds mentioned in Lesson 2 above. Well, I kept all the trimmings from the reeds I cleaned. What I would have put in my compost bin is now perfect kindling. And it took me about ten minutes to get a full box. Perfect use of Permaculture Principle #6: Produce No Waste. Great ideas don't have to be your own!

My new stacks of firewood and my dog.
Lesson 4: Firewood has to be stacked right if you want it to get dry and stay dry, and moving a whole truckload of firewood twice is a lot of work.
This was something I knew if I would have thought about it for more than a few seconds, but I did not. I recently purchased a pick-up truck of firewood from a local family. It was very good quality wood for an excellent price (about $45 US Dollars). The three guys who delivered it dumped it in a relatively neat pile in my garage. They wouldn't let me help them unload it. I tried, but they kept waving me off as if this was part of the delivery price and I had better not try to help or I would greatly and deeply offend them. So I let them pile it in the garage. Unfortunately, the pile of logs did not allow good airflow. After finding a bunch of mold and fungus growing on some of the logs, I decided to restack the pile. This meant I had to move the whole pile away from the wall first and then restack it the right way in the same spot. That was just a little frustrating. However, within just a few days, the logs have already started to dry. Next time, I'll have this great family pile the wood outside. Then I will only have to stack the firewood once!

My bike pump is close to, but not nearly as nice, as this one.
Lesson 5: A bicycle pump will inflate a flat spare tire... eventually.
This was a beat-myself-over-the-head moment. My van got a flat tire. I jacked up the car and took off the flat. I easily put on the spare. My boys were hanging out in the driveway with me having fun and laughing that small spare tires are sometimes called "donuts". I lowered the jack and heard my oldest son, who is four years old say, "Daddy, the donut is flat too!" I have to be honest. I have been giving my friend a hard time for the last few months because his jeep got a flat tire after we had dropped him off at the airport, then his jack wasn't large enough for his jeep (I had to use the jack from my van), and then his spare was flat! How clueless? How unprepared? How... ironic! Fortunately, I had my trusty Power Box in the back of the van! (You can read about how I bragged on this machine in this article) Well, as it turns out, the Power Box is pretty lousy at inflating tires even if it is good at jumping dead batteries, but maybe I just have a bad pump in mine. Either way, it didn't work. Now what? Well, I thought I would give the bike pump a try. Note that I did keep the spare up on the jack while I inflated it, so I didn't have the weight of the car on the tire at the same time. As it turns out, this will work. It took me about 10 minutes, but it resulted in a fully inflated spare tire... and some really burning muscles. Another side lesson: check the air in your spare tire from time to time.
...solidly a lucky live and learn there, with the bucket.
ReplyDeletebut on a positive note great idea using the reeds for kindling.
I have an aunt that grows silphium perfoiliatum
(cup plant,a north american prarie remenant species) to use the dried stalks for kindling, works quite well.
John, you're scaring me!! Great lessons learned. I loved that lessons learned don't necessarily have to be your own. Joan
ReplyDeleteMy husband and I learned a similar lesson with wood ash. We had a metal bucket, but emptied it almost immediately. (I didn't let him freely put them in my garden / compost area because I'd read that too much ash could affect the pH of the soil. I am no composting expert, though!) So one day, of course when the whole extended family was here, we emptied the ashes in a pile of tall grass and brush near a tree. The next thing we knew - it appeared that the tree was on fire! The brush around it was on fire, and it was easily put out - thank goodness. So, not only do ashes need to be placed in a metal bucket, they also need to be COLD before emptied from that metal bucket. Lesson learned! =)
ReplyDeleteAnd I guess that "all-purpose" bucket isn't really "all-purpose," is it?! Haha!
shannon
I appreciate your guidelines. It’s nice information for us.Lucky me I discovered your site by chance,and I am surprised why this coincidence did not happened in advance!I bookmarked it.jow
ReplyDeleteVery useful post. This is my first time i visit here. I found so many interesting stuff in your blog especially its discussion. Really its great article. Keep it up.
ReplyDeletefireplaces Atlanta
Nice to read your article! I am looking forward to sharing your adventures and experiences.
ReplyDeletebuy instagram comments
That's very informative Freestanding indoor fireplace and helpful post. And you have well idea about stacks of firewood. Thanks for give helpful stuff.
ReplyDeleteIt is imperative that we read blog post very carefully. I am already done it and find that this post is really amazing.
ReplyDeletemsnhotmailsignin
This comment has been removed by the author.
ReplyDeleteNice pics and informative post, Thanks for sharing with us. If you wants to Installing Gas Fireplace with cheap price then visits to our site this can help you.
ReplyDeleteHi John,
ReplyDeleteIndeed, ash should only be deposited in a metal bucket. In your future posts maybe we can we see a photo with your fireplace?
thanks, Michael from Thornhill Galleries
I visit your blog regularly and recommend it to all of those who wanted to enhance their knowledge with ease. The style of writing is excellent and also the content is top-notch. Thanks for that shrewdness you provide the readers! Atlanta fireplaces
ReplyDelete
ReplyDeleteThanks for sharing such a nice Blog.I like it.
norton product key
norton com setup product key
www mcafee activate
comcast email support phone number
avg antivirus tech support phone number
webroot customer service
kaspersky support number
Outlook Customer service number
microsoft edge support
Your post has those facts which are not accessible from anywhere else. It’s my humble request to u please keep writing such remarkable articles Atlanta fireplaces
ReplyDeleteكيفية نقل العفش بينبع
ReplyDeleteاسعار نقل عفش بينبع
البحث عن شركات نقل العفش بينبع
شركات نقل العفش بخميس مشيط
كيفية نقل العفش بخميس مشيط
اسعار نقل عفش بخميس مشيط
Привет, подружки! Если еще не поздно, то я красила волосы салоне красоты Diamond Beauty. Хорошие мастера, вышла очень довольная! И недорого! Девочки, рекомендую! маленький маникюр
ReplyDeleteI want to share a testimony on how i got cured totally from Genital Herpes with the help of the herbal remedy i ordered from Dr Ogudugu, i was diagnosed of Genital Herpes 2019 i have been using my Doctor recommended drugs to control the blisters outbreaks but one day i saw a post by someone on how Dr Ogudugu cured her with his herbal remedy, so i decided to give it a try i contacted Dr Ogudugu and he told me how to order the medicine and i did, he sent the medicine to me through DHL delivery service. I took the medicine for 2 weeks and today i am totally cured from herpes and my Doctor confirmed it through a lab test. You can contact Dr Ogudugu through EMAIL: greatogudugu@gmail.com OR HIS WHATSAPP: +2348163026536.
ReplyDeleteexg830k6jk
ReplyDeletegolden goose outlet
golden goose outlet
golden goose outlet
golden goose outlet
golden goose outlet
supreme outlet
golden goose outlet
golden goose outlet
golden goose outlet
golden goose outlet
DR Oyagu you are the best herbalist online no doubts. After using your herbal medication and getting cured I believed you for life and immediately my trust grew up more for you. I sincerely believe lots of people gonna despise you and blaspheme you for no reasons but they don’t know what they’re missing. You’re a powerful healer of herpes. You be my doctor forevermore for life. I rest my case .contact Dr Oyagu on his Email: oyaguherbalhome@gmail.com or via WhatsApp +2348101755322
ReplyDelete