Thursday, January 31, 2013

Permaculture Plants: Juniper

Junipers are a unique addition to a Forest Garden 
(Juniperus communis)

Common Name: Juniper
Scientific Name: Juniperus species
Family: Cupressaceae (the Cypress family)

Most people associate Junipers with arid climates...
but as long as the soil is well-drained, they can grow in a wide variety of locations.
(Juniperus occidentalis) 

Common Species:
  • Common Juniper (Juniperus communis) - large shrub to small tree
  • Alligator Juniper (Juniperus deppeana) - small to medium-sized tree
  • Syrian Juniper (Juniperus drupacea) - medium-sized tree
  • Creeping Juniper (Juniperus horizontalis) - groundcover
  • One-Seed Juniper (Juniperus monosperma) - medium-sized tree
  • Western Juniper (Juniperus occidentalis) - medium-sized tree
  • Rocky Mountain Juniper (Juniperus scopulorum) - small to medium-sized tree
  • Eastern Juniper or Eastern Redcedar (Juniperus virginiana) - small to medium-sized tree

Junipers are such common landscape plants, we can easily forget they have other uses.

Description:
The Junipers are a group of evergreen plants, from small shrubs to tall trees, well known for their berries which are eaten fresh, used as a spice, and are famously used to give gin its characteristic flavor. Junipers are used around the world for landscaping, and J. virginiana (a.k.a. "red cedar") is used extensively in wood working and is notable for its aroma. These plants can be hedges, windbreaks, groundcovers, and sources for wood, to name but a few of their uses. A versatile plant for the Forest Garden.

Common Juniper (Juniperus communis)

History:
The Junipers are a genus of plants containing between 50-70 species. Native to the northern hemisphere, they are likely the most widespread evergreen plant in the world. Prehistoric people used these shrubs and trees for wood, fuel, and food, and their popularity has never ceased.

Trivia:
  • Juniper "berries" are actually modified cones... yes, like the typical pine cones.
  • Most berries are blue when ripe, but some species produce red to orange berries.
  • Juniper berries are the primary flavoring in gin. The name "gin" comes from the Dutch word for juniper, geniver.
  • Most Junipers have two types of leaves: needle-like on young or new growth, and scaled leaves on older growth.
  • Most Juniper berries take about 18 months to ripen.

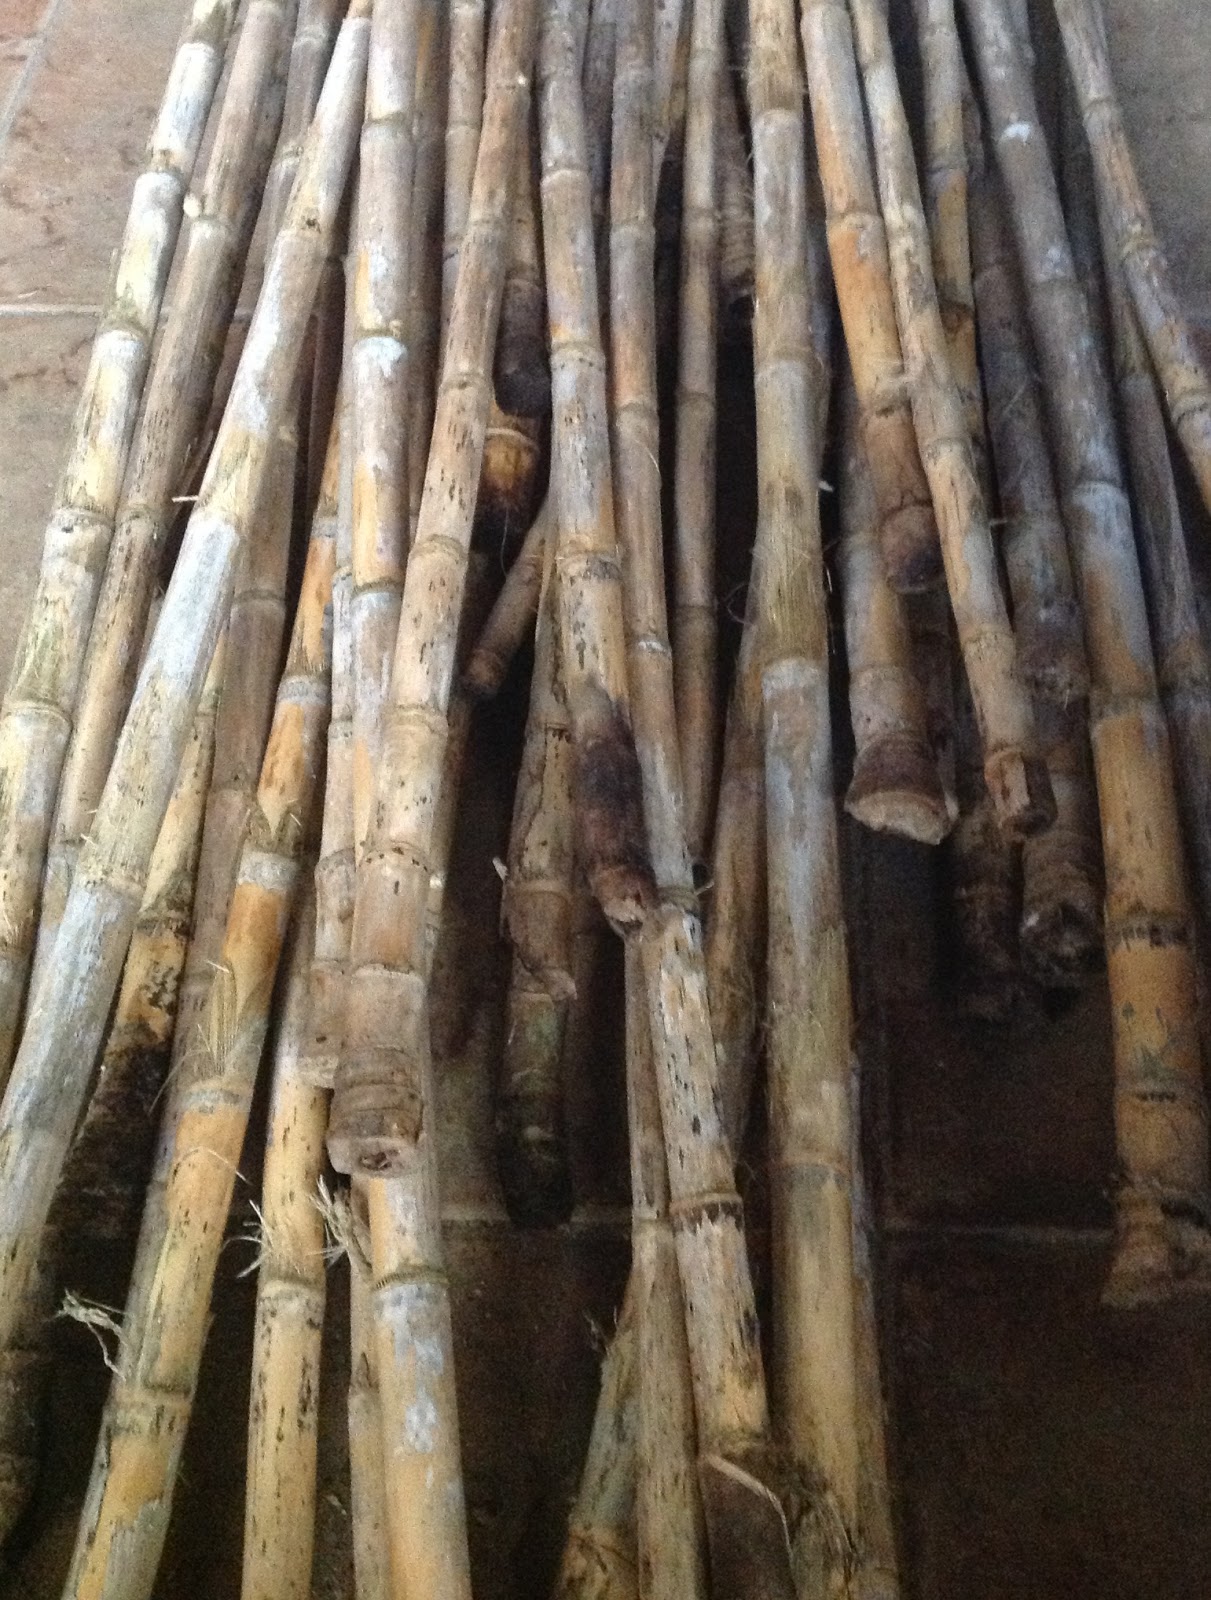
Eastern Juniper or Eastern Redcedar has beautiful, highly aromatic wood.
Here is a great article on sawmilling cedar (Juniperus virginiana

Gin gets its distinctive flavor and aroma from Juniper.

USING THIS PLANT
Primary Uses:
  • Berries (modified cones) - Most species not mentioned here (and also the fruit of the Common Juniper, J. communis) have fruits which are too astringent and bitter to eat raw. However, the fruits of the species listed here, especially J. drupacea, can be eaten fresh. The berries are most common dried and then crushed, and are considered a highly regarded spice. A little goes a long way. Used as a flavoring in many vegetable and meat dishes. Also used as a flavoring agent in some beers and, most famously, gin.
  • New Leaf Shoots - used as flavoring and used for tea
  • Seeds - roasted seeds have been used as a coffee substitute (J. communis, J. scopulorum)

Secondary Uses:
  • General insect pollen plant
  • Wildlife food
  • Windbreak
  • Pioneer Species - this is a slow growing species, so it is not ideal for land that we desire to turn into a Forest Garden right away; however, it can be used on the outskirts of these areas that are more "wild", i.e. Zones 3 and 4. If used in a Forest Garden, take into consideration the time it will take to grow.
  • Drought Tolerant Plant
  • Hedge Plant
  • Groundcover - really just the Creeping Juniper (Juniperus horizontalis)
  • Some species have highly aromatic woods (especially Eastern Juniper/Redcedar)
  • Larger species produce great wood for fence posts (especially Eastern Juniper/Redcedar)
  • Wood may also be used for lumber, tools, crafts, firewood, and traditional bows

Yield: 20-25 lbs (9-11 kg)
Harvesting: Autumn (October-November). Berries are picked when they are at about 18 months if the plant is in its native range, some will be ripe at 12 months, but some can take up to 3 years to mature. Berries are ripe when they darken.
Storage: Use fresh berries right away. Dried berries can last for years, but lose potency the longer they are in storage.

Creeping Juniper (Juniperus horizontalis) makes a stunning groundcover in the right setting.

Junipers are hardy, rugged plants.
(Juniperus communis)

DESIGNING WITH THIS PLANT
USDA Hardiness Zone:
  • Common Juniper (Juniperus communis) - Zone 2
  • Alligator Juniper (Juniperus deppeana) - Zone 8
  • Syrian Juniper (Juniperus drupacea) - Zone 7
  • Creeping Juniper (Juniperus horizontalis) - Zone 4
  • One-Seed Juniper (Juniperus monosperma) - Zone 4
  • Western Juniper (Juniperus occidentalis) - Zone 5
  • Rocky Mountain Juniper (Juniperus scopulorum) - Zone 3
  • Eastern Juniper or Eastern Redcedar (Juniperus virginiana) - Zone 4

AHS Heat Zone:
  • Common Juniper (Juniperus communis) - Zone 6-1
  • Creeping Juniper (Juniperus horizontalis) - Zone 9-1
  • Rocky Mountain Juniper (Juniperus scopulorum) - Zone 7-1
  • Eastern Juniper or Eastern Redcedar (Juniperus virginiana) - Zone 9-1

Chill Requirement: no reliable information can be found

Plant Type: Medium to large-sized Shrubs; Small to medium-sized Trees
Leaf Type: Evergreen
Forest Garden Use: Canopy Layer, Sub-Canopy (Understory) Layer, Shrub Layer, Groundcover
Cultivars/Varieties: Many species, hybrids, and varieties available.

Pollination: Plant is dioecious (has male and female plants). Typically one male for up to eight females are used. Pollinated by the wind.
Flowering: Summer

Life Span:
Years to Begin Bearing: 2-3 years
Years of Useful Life: Potential to live over 800 years!

Unripe berries on Eastern Juniper or Eastern Redcedar (Juniperus virginiana)

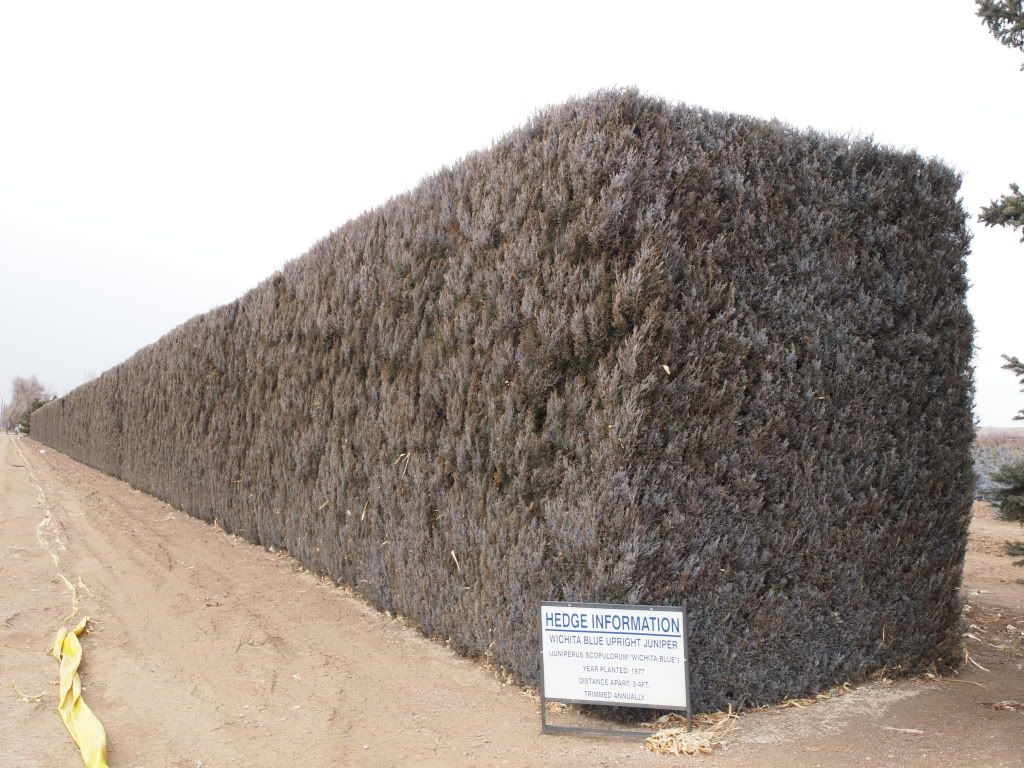
An awful application, but useful example, of a solid Juniper hedge.

PHYSICAL CHARACTERISTICS OF THIS PLANT
Size: these are average or common sizes; many specimens can get significantly taller under ideal conditions and with advanced age
  • Common Juniper (Juniperus communis) - 30 feet (9 meters) tall and 13 feet (4 meters) wide
  • Alligator Juniper (Juniperus deppeana) - 60 feet (18 meters) tall
  • Syrian Juniper (Juniperus drupacea) - 50 feet (15 meters) tall and 6 feet (2 meters) wide
  • Creeping Juniper (Juniperus horizontalis) - 3 feet (1 meter) tall and 9 feet (3 meters) wide
  • One-Seed Juniper (Juniperus monosperma) - 60 feet (18 meters) tall
  • Western Juniper (Juniperus occidentalis) - 60 feet (18 meters) tall
  • Rocky Mountain Juniper (Juniperus scopulorum) - 32 feet (10 meters) tall and 13 feet (4 meters) wide
  • Eastern Juniper or Eastern Redcedar (Juniperus virginiana): typically 16-66 feet (5-20 meters) tall and 26 feet (8 meters) wide, but can get to 90 feet (27 meters) tall

Roots: Juniperus species can grow deep root systems, often with a tap root. If a deep root system does develop, it will develop a shallower lateral root system as well.
Growth Rate: Slow to Medium

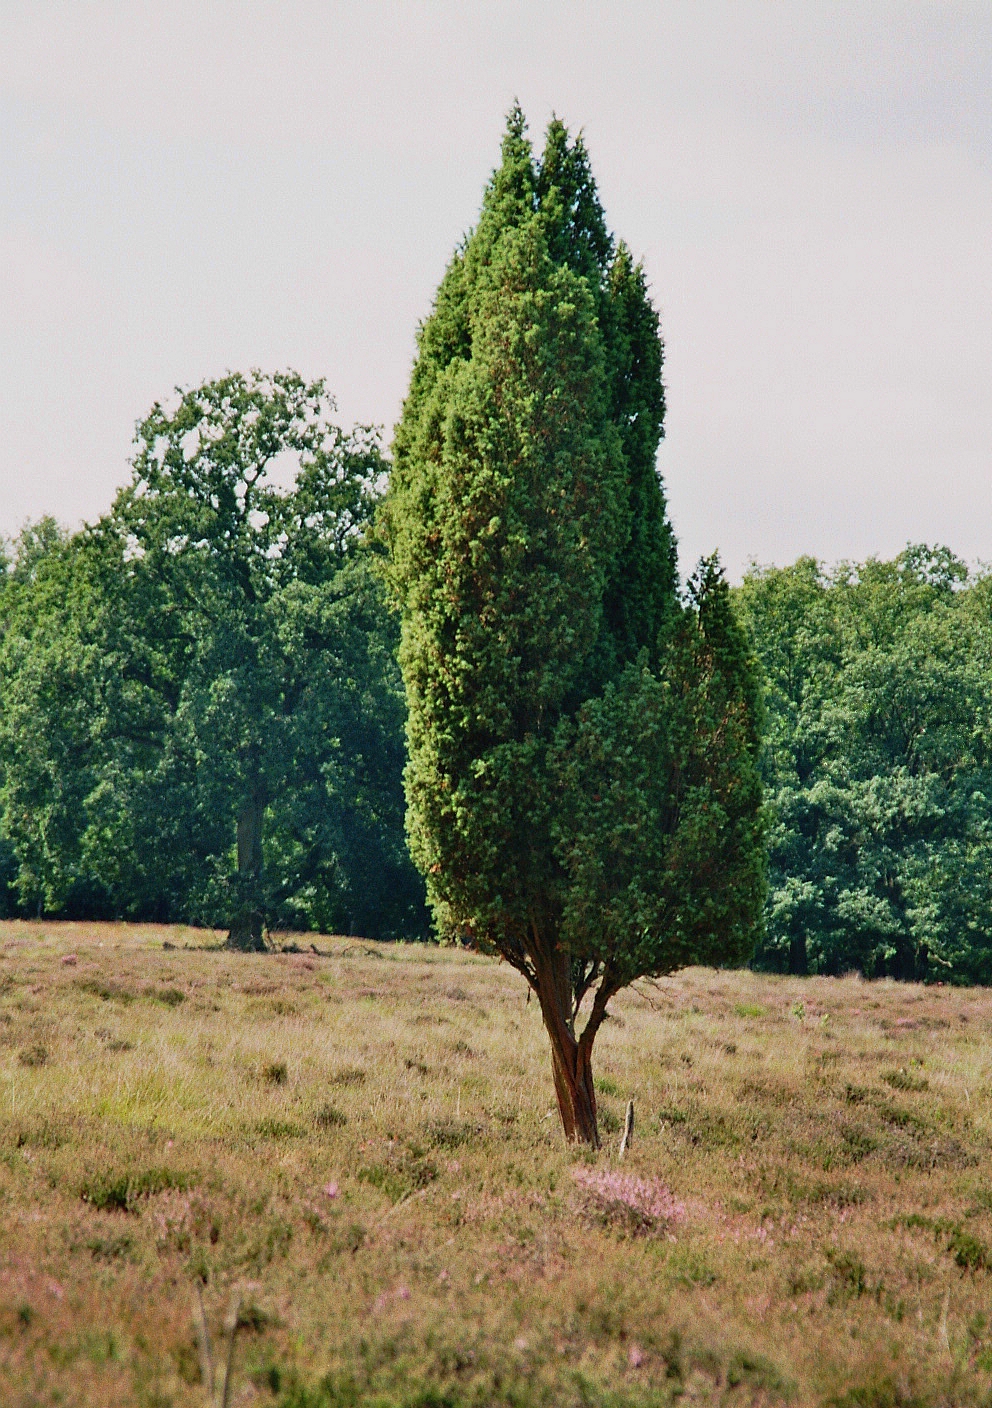
There are a variety of shapes and sizes of Junipers
(Juniperus virginiana)

GROWING CONDITIONS FOR THIS PLANT
Light: Prefers full sun
Shade: Some species tolerate light shade (J. communis) but most do not
Moisture: Medium soil moisture preferred, but these are very resistant to drought
pH: most species prefer fairly neutral to alkaline soil (6.1 - 8.0), but it can grow if very acidic to very alkaline soils.

Special Considerations for Growing:
It is likely that all species tolerates juglone (natural growth inhibitor produced by Black Walnut and its relatives). Consider using this tree as a buffer between your walnuts and other plantings.

Propagation:
Easily from seed. Seeds need about 6 months stratification for germination, which can be slow. Can be grown from cuttings taken in Spring. May develop roots from branches that are buried which can later be divided from the mother plant.

Maintenance:
Weeding around the plant is needed for the first few years in the slower growing species. After that, not much maintenance is needed.

Concerns:
  • Many species are very intolerant to fires... meaning they spread forest fires well. This also means it is a pretty good fuel wood.
  • Some people can have seasonal allergies to the pollen.
  • Some species can spread too easily from seeds (mainly by birds) and can become locally invasive.


Wednesday, January 30, 2013

Book Review: Charcuterie


I received this book from one of my siblings at Christmas. In short, I love it! I recently wrote an article about why I enjoy learning and practicing food preservation (read that article here). I have already tried a few recipes from this book. My favorit so far was the pork confit from my own rendered lard... it was the most tender pork I have ever tasted. My 18-month old daughter almost ate as much as I did! I find it more than interesting that a baby can instictually know quality food. I think it is great.

If you are a foodie and a cook and a person who enjoys meat. You will likely love this book as much as I did. I highly recommend it.

I love this review posted on Amazon:
Starred Review. Without the faintest hint of apology, Ruhlman and Polcyn present an arsenal of recipes that take hours, and sometimes days, to prepare; are loaded with fat; and, if ill-prepared, can lead to botulism. The result is one of the most intriguing and important cookbooks published this year. Ruhlman (The Soul of a Chef) is a food poet, and the pig is his muse. On witnessing a plate of cold cuts in Italy, he is awed by "the way the sunlight hit the fat of the dried meats, the way it glistened, the beauty of the meat." He relates and refines the work of Polcyn, a chef-instructor at a college in Livonia, Mich., who butchers a whole hog "every couple weeks for his students." Together, they make holy the art of stuffing a sausage, the brining of a corned beef and the poaching of a salted meat in its own fat. An extensive chapter on pâtés and terrines is entitled "The Cinderella Meat Loaf" and runs the gamut from exotic Venison Terrine with Dried Cherries to hearty English Pork Pie with a crust made from both lard and butter. And while there's no shortage of lyricism, science plays an equally important role. Everyone knows salt is a preservative, for example, but here we learn exactly how it does its job. And a section on safety issues weighs the dangers of nitrites and explains the difference between good white mold and the dangerous, green, fuzzy stuff.

Here are some other reviews of this fine book:
Charcuterie is an important and definitive work which deserves to stand proudly and forever in every serious cook's kitchen. -- Anthony Bourdain, author of Kitchen Confidential

Charcuterie provides an open window on the delicious possibilities available to the home cook and professional chef alike. -- Paul Bertolli, author of Cooking By Hand

Michael Ruhlman and Brian Polcyn have opened the door for home cooks everywhere to experience the thrill of making charcuterie. -- Mario Batali, chef/owner of Babbo Restaurant, New York

Never has the art of charcuterie been handled this thoroughly for the home cook. -- Lynne Rossetto Kasper, host of American Public Media's national radio series The Splendid Table®

The best techniques to cure, smoke and preserve meat in the tradition of the best charcutiers out there. -- Eric Ripert, chef/co-owner of Le Bernardin Restaurant, New York

Tuesday, January 29, 2013

Free E-Book: An Ax to Grind - A Practical Ax Manual

An Ax to Grind. A Practical Ax Manual. 
by Bernie Weisgerber


I recently posted a fantastic video on axes. The host of this video is Bernie Weisgerber, a US Forest Service historic preservationist. As it turns out, the video was meant to be a companion to his short book, An Ax To Grind, which was produced/printed by the US Department of Agriculture. As such, it is meant to be distributed freely for the furtherance of knowledge. It is a great primer on axes, and it should be viewed as such. It is not the end all, be all of ax books, but it is pretty good, especially if you are new to axes and their history. I found a PDF version of it that reads well in any E-Book reader. Download it (above) if you are interested.

Monday, January 28, 2013

Why Learn to Preserve Food?

Portuguese-style Cured Iberian Ham - delicious!

For quite some time, I have been intruiged with the idea of food preservation, specfically historic food preservation. Humans have preserved food for thousands of years to make it through lean months, most often for the Winter. It is only in the last generation or two, and really only in "modern" cultures, where we have lost this vital knowledge. The reason? Electric refrigeration. The modern refrigerator and freezer are amazing pieces of technology, and I will have and use them as long as I have electricity. However, I think it is important not to lose the knowledge and skills to preserve food. I have a few reasons for this. (I'll be dramatic and outline my reasons in reverse order of importance):

Fifth - We may not always have electricity.
Therefore, we may not always have refrigerators and freezers. Don't worry. I do not think we are going to have some apocolyptic event or some Mad Max-type world, but I do think we have already reached Peak Oil on a global scale. How much time before we start feeling global oil depletion is still up for debate. Alternate energy sources are still not nearly as readily available as electricity from a city or county municipality. There may be a period of time when petroleum-based electricity is waning and alternative-energy-based electricity is phasing in where we may have gaps in service or the price of electricity is just not worth running high electritical use appliances (i.e. refrigerators, freezers, dryers, air conditioners, etc.). The probability for this may be pretty low, but since it is possible, I would like to be a bit better prepared. Reading about food preservation is one thing, actually doing it is another.

Preserved Lemons... so easy to do!

Fourth - Preserving our own food saves money.
Let's look at blackberries. When you are buying blackberries out of season for your local area, they are very expensive. If you buy berries in the Winter, they are imported from overseas, and are going to cost a lot more... and not taste nearly as good. However, if you buy the blackberries during your local blackberry season, then the cost will be much lower, the taste will be much better, and you can preserve them yourself in a variety of ways... as jams, jellies, preserves, or even frozen. Even with what I just said about electricity and freezers, a freezer is a great tool. If you buy and freeze blackberries during the peak of your local season, you will save significant money. Now some will argue that buying already frozen blackberries from the store can be cheaper than doing it all yourself. Sometimes this may be true, but most often it is not. If you grow your own blackberries, the cost goes down even more. And if you pick wild blackberries and preserve them, then the cost is next to nothing other than time. Spending time outside in nature, preferably with friends and/or family, walking and harvesting wild foods... this is not wasted time, and it is probably a better activity than what many now do on their weekends.

Third - It is fun!
I love to cook, and I really enjoy preserving foods. Fortunately I know I am not alone. There are so many different aspects that make it enjoyable. If you have an interest in cooking, baking, gardening, foraging, history, anthropology, homesteading, preparedness, or health, then you can find some aspect of food preservation which will be enjoyable.

My red cabbage sauerkraut... simple and delicious.

Second - It is healthier.
If you have recently looked at the label of almost any food in a grocery store, especially one that does not require refrigeration, then you know that these foods are full of  chemicals we would never add to foods prepared in our own kitchens. In Michael Pollan's book, In Defense of Food, he states a few general rules on buying food. One of these rules states that if you cannot pronounce an ingredient on the label, then you probably shouldn't eat it that food. I whole-heartedly agree. When we preserve our own foods, we know exactly what is it in and why. We can choose to add, or not add, ingredients based on our own tastes and health opinions.

First - Flavor! Flavor! Flavor!
This is my number one reason. Homemade preserved foods can taste far superior to what you can buy in the supermarket. We have the ability to use the best ingredients instead of the leftovers. We have the ability to use homegrown ingredients. We can preserve meats that were organically raised or grass fed or both. We can take the time to "do it right" or make things traditionally, which often take a bit more time and is why mass-produced items don't taste the same. With the widespread use of refrigerators and freezers, we don't need to produce preserved meats or fermented vegetables or even preserved fruits, but we still do. Why? Because we like the taste. When we produce it ourselves, the flavors are better. When we take the time, we can taste it, and we will savor every bite.

Sunday, January 27, 2013

Excellent Video on Axes

Bernie Weisgerber of the USDA Forest Service

The following video was sent to me by my good friend, Jake. This is a fantastic historical and educational video put out by the US Forest Service on the ax, hanging a new handle, sharpening, and working with the ax. There is also good information on the many styles of axes, broadaxes, hatchets, and adzes. This was a perfect video for me as I have been doing a lot more work with firewood, splitting, etc. The host is Bernie Weisgerber, who works for the USDA Forest Service as a historic preservationist. This guy is a genius when it comes to axes and handtools, and he is a great teacher on top of it. If you have any interest in lumberjacking, wood chopping, axes, or history, I would highly recommend watching this video.


Thursday, January 24, 2013

New Permaculture App and My Site is Featured!

The Permaculture App by Smart Media Innovations Pty Ltd

Okay, this is really cool. A friend told me to check out the new Permaculture app for iPhones and iPads. So I did. As it turns out, my site is one of the main sites featured on this app. I am really not sure how that happened, but I am thrilled!

Screen shot from the Apple iTunes page for the App.
This is directly from my website!

First things first... the App is actually really good. There are four main sections. 
  • Tips - right now this section contains only my articles (awesome!)
  • Blogs - there are three currently listed. The first is a blog written by a family in France (Permaculture in Brittany). The second is the blog for the Permaculture Research Institute of Australia. This is the main Permaculture center in the world. It is what Bill Mollison started and is now run by the genius, Geoff Lawton. Finally, there is my blog (again, awesome!). 
  • Courses - A listing of courses available on Permaculture. This is one section that needs a bit of work.
  • Videos - a great collection/listing of videos on all things Permaculture (gardening, sheet mulching, lectures, etc.)


Again, I am really not sure how my site was selected for it. I would like to think it had to do with quality content and all my hard work paying off, but it likely had more to do with a random google search! Either way, I am ecstatic about it. This App is a great resource, and I would be promoting it even if it didn't have my content. Check it out!


Wednesday, January 23, 2013

Questions from Readers: Growing your own tea plants

Camellia sasanqua "Yuletide"

Question:
I am looking into getting a Camellia sinensis to make tea, but I tried to find out if I can make tea out of my Camellia sasanqua. Have you heard of making tea out of other Camellias besides Camellia sinensis?
- Hershal

Answer:
The short answer is yes!

There are up to 250 species of Camellia depending on the botanist who is counting. While the best species for tea is Camellia sinensis, other species can and are used for tea. The more common species used for tea are C. japonica, C. reticulata, and the species you have growing now, C. sasanqua. While these Camellia leaves can be used by themselves (and I would try it by itself for sure), they are typically added to C. sinesis for additional flavor or aroma.

There are a number of varieties of each Camellia species. Many of these, especially in the U.S. were developed for flowers and not for tea. This doesn't mean that you cannot use your leaves, it just means that your leaves may not be as tasty as another variety. I wonder if you know which variety you have. C. sasanqua is most common with pink/red or white flowers, but there are many varieties out there.

Here is a great link to growing and making tea at home from the American Camellia Society.

Here are the Hardiness Zones for the best tea species:

  • C. japonica - Zone 7
  • C. reticulata - Zone 8
  • C. sasanqua - Zone 8
  • C. sinensis - Zone 8


Also, if you are looking for additional uses for your plants, all the Camellia species I named above, as well as a number of others (especially C. oleifera), are used to produce tea seed oil (not to be confused with tea tree oil which is not really edible). The oil is obtained from cold-pressing mature seeds. This is a common cooking oil in China. In some locations, it is the most common cooking oil. It has many of the health benefits of olive oil, but it has I much higher smoking temperature, so it can be used to fry foods as well. Sounds like a pretty great cooking oil to me. Now you've got me wanting to try it!

Finally, I must add that this question was fantastic, because it made me realize/remember that I have a couple C. japonica in my yard right now. I will be trying to make some tea this weekend!

Best of luck. Keep us posted!

John


I have recently been getting more and more questions from readers, and I have tried to keep up and individually respond to all of them. I have been getting a bit behind. Because so many of these questions are really good, I thought I would start sharing them when I get the chance. So please, ask your questions! I'll do my best to give a good answer.

Tuesday, January 22, 2013

Lessons Learned This Week About: Fireplaces, Reeds, and Tires

Over the last few days I learned a few valuable lessons. 

Antique Ash Bucket from 19th Century England

My Ash Bucket... the fact it says "Homer"on it should have been a clue!

Lesson 1: Never put ashes from a fireplace into anything other than a metal container or you may come really close to starting a house fire.
First, in my defense, I did not grow up in a rural area. I did not grow up in a cold area. I grew up in the sprawling suburbia of southern Florida. We did not have fireplaces. There were a few people who did, but these fireplaces were for show. Heck, there were only a few days a year you could actually light a fire in a fireplace, and then you probably had to open a window due to overheating. The last few months, living on a rainy, windblown island in the North Atlantic in a house with no central heat, we have relied on the fireplace to warm up our living room. And true to its name, this is the room where we have lived the most due to the fireplace and its warmth.

So, back to the lesson... I cleaned out the fireplace a few mornings ago, and just like every other time for the last few months, I placed the ashes into a plastic bucket. I typically carry it outside and dump it in the compost bin. This time, because it was raining and cold and windy, I didn't bring it out right away. In fact, I placed the bucket in a big box where I keep old packing paper that I use for kindling. Later that evening, about 10 hours later, I went upstairs and smelled something burning. It smelled a bit like wood and a bit like plastic. I wasn't really sure. My wife and I walked all around the room trying to locate the smell, but we couldn't locate it. Another hour passed, and I sat down to read, but the smell was stronger. I climbed around the room, smelling receptacles and light sockets. And then I came to the box with the bucket of ashes in it. The smell was really strong in there. I lifted the bucket up, and the entire bottom of the bucket fell off. Strands of melted plastic, like cheese on a pizza, dripped all over. In the center of it all was a big pile of ashes and a few dozen bright orange embers, still very much alive. In fact, my lifting the bucket gave those embers new oxygen and a new life. The paper in the box, now covered with hot embers started smoldering. I carried the box outside to the concrete porch just in time for some of the papers to ignite. Now I see why I always saw metal buckets for ashes in old movies and at historical sites.

House fire barely avoided. Lesson learned.


Giant Reed (Arundo donax) patch near my house.

Cleaned and partially dried reeds.

Lesson 2: You can find free gardening material all over the place if you take the time to observe, but if you are lazy you may come really close to missing out.
This is a perfect illustration of Permaculture Principle #: Observe and Interact. Within a one minute walk from my front door is a patch of giant reeds. The top photo was taken the past summer. I had been telling myself to go over there for months and get some. Well, fast forward about 6 months, and the patch is only about half green. The cold and wind has killed off most of the reeds. Unfortunately, about half of the dead reeds were blown to the ground and are mostly rotted. Luckily, there were still quite a few in good shape. I grabbed a bunch and brought them back to my house. I cleaned them, stacked them, and I am letting them dry out some more until I need stakes and supports for my Spring and Summer garden. It cost me all of twenty minutes! If I waited another few weeks until after the next big wind storm, I may have missed this opportunity. So the key here is to not just observe, but get off my butt and interact!


My stockpile of kindling, gathered and made.

Lesson 3: You can find uses for "waste" items if you really try, or if you have someone give you the idea first.
I have been running out of kindling for the past month. I had a few boxes of kindling that my father had prepared and saved for me this Summer when he visited, but I finally ran out a week ago. Again, I never used a fireplace on a regular basis until now. I had no idea how much kindling I was going to need. For the past week, I have been using all kinds of scraps of wood and cardboard. I have been getting pretty good at starting fires with less and less. In fact, I have been pretty proud of how good I have become at starting roaring fires with almost no kindling. But my meager supplies have been getting pretty thin. Finally, I spent half a day chopping firewood with a hatchet (no, I don't own an axe yet!) into smaller and smaller pieces for kindling. I rather enjoyed the work, but it took quite a while. Then my neighbor told me to use the dried reeds for kindling. "They burn great!" she said. This is what finally got me off my butt to go get the reeds mentioned in Lesson 2 above. Well, I kept all the trimmings from the reeds I cleaned. What I would have put in my compost bin is now perfect kindling. And it took me about ten minutes to get a full box. Perfect use of Permaculture Principle #6: Produce No Waste. Great ideas don't have to be your own!


My new stacks of firewood and my dog.


Lesson 4: Firewood has to be stacked right if you want it to get dry and stay dry, and moving a whole truckload of firewood twice is a lot of work.
This was something I knew if I would have thought about it for more than a few seconds, but I did not. I recently purchased a pick-up truck of firewood from a local family. It was very good quality wood for an excellent price (about $45 US Dollars). The three guys who delivered it dumped it in a relatively neat pile in my garage. They wouldn't let me help them unload it. I tried, but they kept waving me off as if this was part of the delivery price and I had better not try to help or I would greatly and deeply offend them. So I let them pile it in the garage. Unfortunately, the pile of logs did not allow good airflow. After finding a bunch of mold and fungus growing on some of the logs, I decided to restack the pile. This meant I had to move the whole pile away from the wall first and then restack it the right way in the same spot. That was just a little frustrating. However, within just a few days, the logs have already started to dry. Next time, I'll have this great family pile the wood outside. Then I will only have to stack the firewood once!


My bike pump is close to, but not nearly as nice, as this one.

Lesson 5: A bicycle pump will inflate a flat spare tire... eventually.
This was a beat-myself-over-the-head moment. My van got a flat tire. I jacked up the car and took off the flat. I easily put on the spare. My boys were hanging out in the driveway with me having fun and laughing that small spare tires are sometimes called "donuts". I lowered the jack and heard my oldest son, who is four years old say, "Daddy, the donut is flat too!" I have to be honest. I have been giving my friend a hard time for the last few months because his jeep got a flat tire after we had dropped him off at the airport, then his jack wasn't large enough for his jeep (I had to use the jack from my van), and then his spare was flat! How clueless? How unprepared? How... ironic! Fortunately, I had my trusty Power Box in the back of the van! (You can read about how I bragged on this machine in this article) Well, as it turns out, the Power Box is pretty lousy at inflating tires even if it is good at jumping dead batteries, but maybe I just have a bad pump in mine. Either way, it didn't work. Now what? Well, I thought I would give the bike pump a try. Note that I did keep the spare up on the jack while I inflated it, so I didn't have the weight of the car on the tire at the same time. As it turns out, this will work. It took me about 10 minutes, but it resulted in a fully inflated spare tire... and some really burning muscles. Another side lesson: check the air in your spare tire from time to time.


Thursday, January 17, 2013

Permaculture Tip: What to do with your Sprouted Garlic Bulbs

My bowl of sprouted garlic bulbs.

When I use fresh garlic (and you should, too... not that jar of pre-minced stuff!), I inevitably have some cloves start to sprout. Maybe the garlic was older, or the moisture in my kitchen higher. Whatever the reason, a decision has to be made. Can I use it? The short answer is yes. Here are a few ways:

1) Use it as normal. If the sprout is small, and the clove has not become soft, then it will have little influence on the dish. Chop the sprout with the clove, and use it as if it wasn't even there. The old wive's tales you may have heard from your mother or grandmother about sprouted garlic being poisonous or causing cancer or causing ulcers or whatever... all wrong. Sprouted garlic is just fine to eat. No worries.

2) Trim out the sprout. Some people don't want green in whatever it is they are cooking. Some people think the spout tastes bitter, though I have never found it to be so. But if you do not want the sprout, and the rest of the bulb is still firm and still smells like good, fresh garlic, then just cut the bulb in half, right down the long side of the sprout, and peel it out. It is quite easy to do. Then use the rest of the garlic bulb as normal.

3) Plant it! This is one of my favorite things to do with sprouted garlic bulbs. I typically have a pile of sprouted garlic bulbs in my kitchen (see the photo above). When the pile gets too big, I take them outside and plant them everywhere I can. Just place them sprout side up in the dirt and push down until the bulb is covered all the way. Put them in the flower boxes. Put them in pots. Put them in the hanging planters. Put them amongst the flowers and vegetables. Put them anywhere you have dirt. If it is too cold outside, then put them in planters in the house. They grow easily and fast. Leave them in place long enough, and a new head (with a bunch of new cloves) will form.

Note: This works for garlic and onions and shallots alike. I even take scallions (a.k.a. green onions) that still have some roots and plant them as well. Typically, the bunch from the store has just a few too many shoots for the meal I am making. The extras go right into the garden after I trim the wilted leaves off of them. I have at least a dozen scallion plants growing in just one planter near my driveway. It is so simple, takes next to no work, and provides me with fresh, flavorful ingredients... just a snip away!

Permaculture Tip is an idea that is derived from observing and interacting with nature.  It is simple.  It is safe.  It is effective.  It helps build a sustainable system of agriculture and life in general.  If you have any Permaculture Tips you would like to share, please let me know.  I will post it here, give you the credit, and post a link to your blog or website if you have one.  Email me here: kitsteiner@hotmail.com

Wednesday, January 16, 2013

Permaculture Plants: Hazelnuts (aka Filberts)

One of the world's most popular nuts... the Hazelnut

Common Name: Hazel, Hazelnuts, Filberts
Scientific Name: Corylus species
Family: Betulaceae (the Birch family) or Corylaceae (the Hazel family) depending on the botanist

Fresh Hazelnuts. This variety in England is called the Kentish Cobnut.

Common Species:
  • American Hazel (Corylus americana) – large shrub
  • European Filbert or Common Hazel (Corylus avellana) – large shrub
  • Chinese Tree Hazel (Corylus chinensis) – large tree
  • Turkish Tree Hazel (Corylus columa) – large tree
  • Beaked Hazel (Corylus cornuta) – large shrub
  • California Hazel (Corylus cornuta californica) - tree
  • Himalayan Hazel (Corylus ferox) - tree
  • Asian or Siberian Filbert (Corylus heterophylia) – large shrub
  • Common Filbert (Corylus maxima) – large shrub
  • Asian Beaked Hazel (Corylus sieboldiana) – large shrub
  • Tibetan Hazel (Corylus tibetica) - tree
  • Trazel (Corylus x columoides) – large tree (hybrid of European Filbert and Turkish Tree Hazel)
  • Filazel/Hazelbert (Corylus x hybrids) – large shrub
  • Chinese Trazel (Corylus x vilmorini) – large tree

Harvesting Hazelnuts
Seed (Left), Seed in Husk (Center), Seeds in a bunch from the tree (Right)

Description:
The Hazels are a group of deciduous large shrubs to large trees that are best known for their edible nuts. They are also fantastic windbreak and living fence plants – they were the traditional boundary markers in England. They provide pollen, food, and shelter for wildlife, and their wood has a large number of uses. These are great plants to blur the boundary from wild to garden.

European Filbert or Common Hazel (Corylus avellana)

History:
The Hazels are a genus of plants containing 14-18 species that are native to the northern temperate climates of the globe. Every species produces edible nuts, but some are larger and tastier than others especially the cultivars that have been developed in recent years.

Trivia:
See my previous articles on "What's in a name? Hazelnuts vs. Filberts vs. Cobnuts" and "Eastern Filbert Blight"

Hazelnuts are used in a wide range of food and drink.
Here is the Rogue Hazelnut Brown Nectar ale

USING THIS PLANT
Primary Uses:
  • Edible nuts – raw, dried, or cooked; the more developed varieties/hybrids have a better flavor
  • Oil can be pressed/expelled from the nuts
  • Dried nuts can be ground into flour

Secondary Uses:
  • General insect pollen plant
  • Nut is a wildlife food of mammals and birds
  • Shrub forms provide shelter for wildlife
  • Windbreak
  • Edible hedge plant
  • Most species can be coppiced (every 6-15+ years)
  • Wood can be used for stakes, rods, thatching, fences, tools, handles, firewood, charcoal, etc.

Yield: 11-25 lbs (5-11 kg) depending on the size of the plant
Harvesting: Late Summer through early Autumn (late August – October). Nuts are either harvested from the ground or with nets while the tree is shaken.
Storage: Dried nuts will store for many years

The female (small and pink) and male (long and pale) catkins (flower clusters) on a Hazel

DESIGNING WITH THIS PLANT
USDA Hardiness Zone:
  • American Hazel (Corylus americana) – Zone 3
  • European Filbert or Common Hazel (Corylus avellana) – Zone 4
  • Chinese Tree Hazel (Corylus chinensis) – Zone 7
  • Turkish Tree Hazel (Corylus columa) – Zone 5
  • Beaked Hazel (Corylus cornuta) – Zone 3
  • California Hazel (Corylus cornuta californica) - Zone 4
  • Himalayan Hazel (Corylus ferox) - Zone 8
  • Asian or Siberian Filbert (Corylus heterophylia) – Zone 5
  • Common Filbert (Corylus maxima) – Zone 5
  • Asian Beaked Hazel (Corylus sieboldiana) – Zone 6
  • Tibetan Hazel (Corylus tibetica) - Zone 7
  • Trazel (Corylus x columoides) – Zone 5
  • Filazel/Hazelbert (Corylus x hybrids) – Zone 3
  • Chinese Trazel (Corylus x vilmorini) – Zone 5

AHS Heat Zone: 3-9
Chill Requirement: less than 100 up to 1,700 hours/units depending on the species and variety

Plant Type: Medium to large-sized Shrubs; Medium to very large-sized Trees
Leaf Type: Deciduous
Forest Garden Use: Canopy Layer, Sub-Canopy (Understory) Layer, Shrub Layer
Cultivars/Varieties: Many species and varieties available.

Pollination: Many of the hybrids and improved varieties are self-fertile, but the undeveloped species require cross-pollination from at least one other variety/cultivar. All varieties will benefit (i.e. produce more nuts) when allowed to cross-pollinate. Note that many Corylus species will cross-pollinate with other varieties and species. Check with your supplier for more specific information since there are so many species and varieties and hybrids. Pollinated by wind.
Flowering: Early Spring through Summer

Life Span:
Years to Begin Bearing: 3-4 years
Years of Useful Life: 40-50 years, but likely much more for the larger tree species; also considering the suckering nature of the shrub species, new shoots will develop into plants to replace older plants thereby making the thicket’s lifespan indefinite.

A large Hazelnut

PHYSICAL CHARACTERISTICS OF THIS PLANT
Size:
  • American Hazel (Corylus americana) – 6-12 feet (1.8-3.5 meters) tall and 6-20 feet (1.8-6 meters) wide
  • European Filbert or Common Hazel (Corylus avellana) – 12-25 feet (3.5-7.5 meters) tall and 25 feet (7.5 meters) wide
  • Chinese Tree Hazel (Corylus chinensis) – 120 feet (36 meters) tall and 75 feet (22 meters) wide
  • Turkish Tree Hazel (Corylus columa) – 80 feet (24 meters) tall and 30 feet (9 meters) wide
  • Beaked Hazel (Corylus cornuta) – 6-12 feet (1.8-3.5 meters) tall and wide
  • California Hazel (Corylus cornuta californica) - 26 feet (8 meters) tall
  • Himalayan Hazel (Corylus ferox) - 33 feet (10 meters) tall
  • Asian or Siberian Filbert (Corylus heterophylia) – 23 feet (7 meters) tall
  • Common Filbert (Corylus maxima) – 19 feet (6 meters) tall and 16 feet (5 meters) wide
  • Asian Beaked Hazel (Corylus sieboldiana) – 16 feet (5 meters) tall
  • Tibetan Hazel (Corylus tibetica) - 50 feet (15 meters) tall
  • Trazel (Corylus x columoides) – 60 feet (18 meters) tall and 40 feet (12 meters) wide
  • Filazel/Hazelbert (Corylus x hybrids) – 12-15 feet (3.5-4.5 meters) tall and 12-20 feet (3.5-6 meters) wide
  • Chinese Trazel (Corylus x vilmorini) – 82 feet (25 meters) tall

Roots: All the shrub forms have fibrous, suckering roots that will send up new shoots to form a clumping thicket
Growth Rate: Medium to Medium-Fast


Hedgerows, often of Hazels, were traditionally used as boundary markers in Britain.


GROWING CONDITIONS FOR THIS PLANT
Light: Prefers full sun
Shade: Tolerates deep shade, but nut production is reduced proportionate to light reduction
Moisture: Medium soil moisture preferred
pH: most species prefer fairly neutral to alkaline soil (6.1 - 7.5)

Special Considerations for Growing:
Tolerates juglone (natural growth inhibitor produced by Black Walnut and its relatives). Consider using this tree as a buffer between your walnuts and other plantings.

Propagation: Stool layering is common. Can divide suckers in early Spring. Usually grafted. Seeds need at 16-20 weeks stratification for germination.

Maintenance:
Minimal. May need to cut back the shoots from suckering roots if you do not want a thicket or hedge.

Concerns:
Some people have seasonal allergies to the pollen


Tuesday, January 15, 2013

Eastern Filbert Blight. What is it and what do we do about it?


Hazelnuts... a nut that has been planted around the world

Eastern Filbert Blight (EFB) is a disease of Hazel shrubs and trees. As I have explained in my previous article (What's in a name? Hazelnut vs Filbert), Hazels are also known as Hazelnuts or Filberts and even Cobnuts. Eastern Filbert Blight is caused by Anisogramma anomola. This is a fungus originating in northeastern North America, and it infects Hazels (Corylus species). When growing on these plants (i.e. plants that are native to the area that this fungus naturally occurs), the fungus is not a problem.

The small cankers of a mild Eastern Filbert Blight infection.

However, with the advent of international travel and the spread of cultivated plants, we soon realized that this fungus can be deadly to non-native Hazels (i.e. Hazels that are not native to the eastern United States and Canada). When these plants are infected, very large cankers grow around the trunk and slowly suffocate or “girdle” the plant. Most plants die within 5-10 years after infection, and plants that do not die have a significant decline in productivity.

A Corkscrew Hazel (a named variety) infected, and slowly dying, of EFB

The problem is that most commercial orchards are composed of non-North American Hazels, typically varieties of the European Filbert (Corylus avellana). These plants are devastated by Eastern Filbert Blight. Many attempts to grow the tastier European Filbert in the eastern U.S. failed due to poor understanding of this disease; however, large and successful orchards of European Filberts have grown very well in the Pacific Northwest for over a hundred years.

Unfortunately, in 1973, the Eastern Filbert Blight was identified in the Pacific Northwest. How it got there, no one is certain, but we do know that it has been slowly spreading through commercial orchards since. There are very large campaigns funded by the U.S. and Canada to identify and halt the spread of this disease, and there are fungicides are available that can kill A. anomola.

With all this information, what is the home grower to do? Fortunately, there are many new cultivars and hybrids that have been developed with partial to almost complete tolerance or resistance to Eastern Filbert Blight. Treating trees with fungicides has a lot of unintended consequences.

My recommendation is just to plant trees resistant to the blight. Most of us are not going to be commercial Hazelnut growers. We don’t have acre upon acre of European Filberts, and we don’t have our sole source of income depending on the size of nut or quantity of harvest. Granted, some of the hybrids produce nuts that are smaller than the larger commercial hazelnuts, but when it comes to long-term health of our bodies and our land, as well as the time spent in trying to identify, prevent, and treat this disease, a smaller nut is not that big of a deal.

Monday, January 14, 2013

What’s in a name? Hazelnut vs. Filbert vs. Cobnut

Hazelnuts... one of my favorite nuts!

What is the difference between a Hazelnut and a Filbert and a Cobnut? This is a convoluted issue with a lot of history, but here is my best attempt to piece it all together:

To begin with, there are between 14-18 species in the Corylus genus, depending on the botanist. All of the Corylus species are technically in the Corylaceae Family which many modern botanists are calling the Hazel family. Therefore all Corylus species produce “hazelnuts” in a general term.

Shelled Hazelnuts.

The name “hazel” likely comes from the Anglo-Saxon word haesel which means bonnet or head-dress. This describes the shape of the shell surrounding the nut. It is unlikely describing the color of the nut.

Many hundreds of years ago, the hazel species in Britain were given the common name “filbert”. Species that were discovered by British botanists in later years were often given the common name filbert if they were a shrub and hazel if they were a tree.

So where did the name “filbert” come from? There are two possible reasons for this name. The first is that the nuts mature around 22 August, a.k.a. St. Philibert’s Day (Saint Philibert of Jumieges was a French monk). The second reason is that the husked shell of a hazelnut resembles a beard, and the German word for “full beard” is vollbart. Over time, with English influences, this word may have became “filbert”. However, no one is really sure which the real origin of the name is.

With all that said, any Corylus species that have the common name “filbert” (i.e. European Filberts, Common Filbert, etc.) produce filberts, but they technically are all hazelnuts.

Kentish Cobnuts... fresh and ready to eat.
http://farm2.static.flickr.com/1192/1349145989_e09bbfcd0f.jpg

Now to further confuse the issue, some varieties of hazels grown in Britain are called “cobnuts”. This was based on a game kids used to play with the nuts where the winning nut was called the cob. Most cobnuts are cultivars of a variety named Kentish Cob. Cobnuts are also unique in that they are typically sold fresh, not dried. This gives the nuts a seasonal market and unique culinary uses.

To be complete in my explanation, some will say that filberts are longer and thinner, and non-filberts are shorter and more round. This is sometimes true, but is often based on species and varieties/cultivars.

A selection of nuts from an unspecified and unnamed group of British trees.
Note the variation on sizes and shapes... 

Finally, what really throws this whole naming scheme off is that people have regional preferences for what they call the nut from Corylus species. If you are in eastern North America, they may be called either filberts or hazelnuts depending on your family history. If you are in the Pacific Northwest, they are filberts to the older generation; the younger generation knows them as hazelnuts thanks to marketing starting in 1981. If you are in England or Europe, you probably call then filberts unless you specifically are speaking about cobnuts. If you are in Turkey, you probably call them hazelnuts. Of course, in Asia the local names are completely different.

So there you have it. In the end, I don't really care what they are called. These are just one of my favorite nuts!

Stay tuned for more information about growing Hazels.