Friday, October 28, 2011

WHIP: Wildlife Habitat Incentive Program

An Oregon riparian are restored through WHIP.

WHIP (The Wildlife Habitat Incentive Program) is a government program run by NRCS (the National Resource Conservation Service) in the United States.  This program provides money to landowners to help them protect, enhance, and/or develop critical wildlife habitat.  It is completely free money; it is a cost-share program.  Meaning, the landowner needs to invest some, and the organization (i.e. the government) will pay the rest.

WHIP will generally pay 50% to 75% of the cost of approved expenses, and they will generally not pay more than $5,000 per year per landowner.  WHIP will chose who to assist based on the potential environmental benefit.  If your land is identical to the protected national or state park you border, then it is unlikely that you will be selected.  However, if you have, for instance, an area that could be improved to be a wetland habitat for migrating water birds, then you have a good shot.  It just depends.

There is a minimum of a 5-10 year commitment on the landowners part to maintain the agreed upon project.  I believe more funding, or higher percentages, may be available for longer-term commitments. The landowner must also agree to allow WHIP personnel to visit the area to verify the project is being run as agreed.

While this may be too much government interference for some, others may have a plot of land that is not useful to them as is, and WHIP can help transform it into a mini wildlife sanctuary.  If you are interested in learning more, there is a WHIP program in each state.  You will need to search for it under the NRCS, Conservation and Environmental Protection Division.  Just google search "WHIP", "NRCS" and your state, and you should find it easily after that.


Thursday, October 27, 2011

Book Review: The Sibley Guide to Trees


I previously discussed David Sibley’s book, The Sibley Guide to Birds, which is my favorite birding book of all time.  David Sibley put his skills of observation, painting, and teaching back to work to develop The Sibley Guide to Trees.  I believe this book will be the mainstay of tree guides for a long time.

What I liked so much about his bird guide book is that Sibley is able to find the one or two things that make one species unique from all other similar species.  I have found some trees to be much more difficult to identify than birds, because some species are so similar and trees can change form to some degree based upon the conditions (or teroir) they are grown.  Sibley beautifully cuts through this confusion and gives us key points to find to identify each tree.  Also, Sibley does not just include the common trees of North America, but he includes the uncommon and introduced species as well.

I am thrilled to share this book on my blog.  I have waited a long time for a tree guide that is easy to use, reliable, inclusive, but most importantly, I wanted a tree guide that works.  I believe this is it.  I highly recommend this book!

Here are a few great videos of the author explaining his book.  I love the second interview... he is a genius!


Wednesday, October 26, 2011

Recipe: Whipped Honey


Whipped Honey... You've got to try it!

For anyone who has ever tried Whipped Honey, you understand why this form of honey is so popular.  Of course, regular liquid honey is the most commonly sold and used form of honey, but whipped honey is a fantastic way to enjoy this sweet treat.

Perfect accompaniment for breakfast or light snack.

What is Whipped Honey?
Whipped Honey is also called Creamed Honey, Spun Honey, Churned Honey, Candied Honey, Set Honey, Honey Fondant, and Spreadable Honey.  These names suggest that maybe some ingredient was added to the honey or that the honey was churned or spun.  In reality, Whipped Honey is nothing more than a type of crystallized honey.

Most of us are familiar with how honey crystallizes.  It often occurs around the lid, but honey crystallization can occur throughout the entire jar.  This is not a sign of spoiling or bad honey.  All honey can and will crystallize if old enough or cold enough.  You can reverse this by placing the jar or bottle of honey in some warm water or a sunny window.  The quality will still remain good, because honey truly never spoils unless it is contaminated.

The crystals in our old or cold honey are large crystals.  You can eat this honey.  It is crunchy.  I actually like it on a peanut butter and honey sandwich.  In contrast, the crystals in Whipped Honey are much smaller.  They are so small that they give the honey a smooth and spreadable consistency.  Also, these small crystals prevent the formation of the larger, harder, and crunchier crystals in the honey.

The Dyce Method
The first practical method of making Whipped Honey was developed in 1928 by Elton .J. Dyce, Ph. D., professor of Apiculture at Ontario Agricultural College, while he was working at Cornell University.  After finely grinding large, hard honey crystals, he added between 5-10% of the fine crystals to 90-95% regular, liquid honey.  The crystals are gently stirred into the liquid honey and allowed to rest at a temperature of 57 F (14 C).  In about a week, the "seed" crystals have converted most of the liquid honey to Whipped Honey.  The "seed" crystals don't actually "reproduce" themselves as some have suggested, but it is rather a chemical/physical reaction that spreads through the honey, and the "seed" crystals act as the impetus.

If you have the right spot, making Whipped Honey is very easy!

Making Whipped Honey at Home
We can make Whipped Honey relatively easily at home if we have a place that stays at a steady cool temperature of 55-59 F, ideally at 57 F.

  • Find a location with a steady, cool temperature.
  • Purchase a good quality Whipped Honey - this will be your "seed" or "starter".
  • Take a clean jar and fill it 90-95% with liquid honey.
  • Fill the remainder of the jar with Whipped Honey (less than 5% will produce coarse crystals, and more than 10% is not needed).
  • Stir the Whipped Honey through the liquid honey.
  • Let sit in the cool location for 1-2 weeks.


Previous related articles:


Tuesday, October 25, 2011

Permaculture Tips: Use Your Car As a Dehydrator


Use Your Car As a Dehydrator
From Organic Gardening June/July 2011

Fresh figs being dehydrated in the window of a car!

Ginger Li from Homewood, Illinois explains how she dehydrates mint, basil, kale, Swiss chard, cilantro, dill, etc. by placing them in a single layer on a cookie sheet.  She placed the cookie sheets on the seats of her car, parked in the sun, with the windows just barely cracked to vent the humid air.

I read this as a Reader Comment in Organic Gardening, but I ended up finding many references to it on the internet.  Apparently, this is a growing trend.

Fantastic idea!  Beautiful way to utilize free energy!


Permaculture Tip is an idea that is derived from observing and interacting with nature.  It is simple.  It is safe.  It is effective.  It helps build a sustainable system of agriculture and life in general.  If you have any Permaculture Tips you would like to share, please let me know.  I will post it here, give you the credit, and post a link to your blog or website if you have one.  Email me here: kitsteiner@hotmail.com

Monday, October 24, 2011

Permaculture Plants: Roses, an Introduction to Rose Types


Large-Flowered Climbing Rose: Graham Thomas Rose


I recently received this email from a reader:

Hi John, this isn't actually a temperate climate question, but I'd love to hear your thoughts anyways. I've just moved into a new home in Southern Turkey where the climate is similar to that of southern California. I'm hoping to experiment with some permaculture projects in my living space and want to start with what's already there. There is a large Bougainvillea bush ("paper flower") in the back yard and roses in the front yard. Do you have any insights from your reading about the benefits and uses of these two plants in particular and how they as ornamentals might fit into a permaculture system? 


In general, Roses are found all over the world.  There are native Roses from Asia, Europe, North America, and Africa.  Roses are a perfect topic for this blog.  The topic of Roses is really quite big, so I thought I would break it up in smaller, more digestible chunks.  I'll start off with a general introduction to the Rosa species, and then I will move on to more specific species and important aspects of Rose care that would be important for a Permaculturist and/or Homesteader.  So here goes...

Rambling Rose: American Pillar Rose


Common Name: Rose
Scientific NameRosa species…
Family: Rosaceae

There are over 100 species of roses in the world, and this number may be closer to 150, but botanists cannot decide, and there are thousands of varieties or cultivars of these species.

There are four major types of roses:


1. Climbing Roses: 
These roses don’t really climb, but they have long and flexible canes that can be trained and/or attached to fences, trellises, and other garden structures. (pictured above)
  • Large-Flowered Climbing Roses – thick canes, grow to 10 feet long, large flowers, blooms through the summer (repeat-blooming).  Many different flower bloom shapes and colors
  • Rambling Roses – thin canes, grow 20+ feet long, small flowers, bloom in early summer (once-blooming)

Shrub Rose: Zephirine Drouhin


2. Shrub Roses: 
Broad, upright shrub that grows 4 – 12 feet tall.  Most are very hardy.  There are both once-blooming and repeat-blooming species and varieties.
3. Groundcover Roses: 
As the name implies, these are low growing, prostrate, creeping roses.  There are both once-blooming and repeat-blooming species and varieties.
4. Bush Roses: 
Bush roses include the majority of roses in the world.  There are seven subtypes or subgroups of Bush Rose, and each subtype has dozens to hundreds of varieties of each.
  • Hybrid Tea Roses – narrow buds on a long stem, large many petaled flowers, repeat-blooming, 3-5 feet tall.
  • Polyantha Roses – very hardy, short bushes with small flowers in large clusters, repeat-blooming.
  • Floribunda Roses – developed from crossing hybrid tea roses with polyantha roses, very hardy, short bushes with medium-sized flowers in clusters, repeat-blooming
  • Grandiflora Roses – tall, narrow bush that grows to 5-6 feet, large flowers, long stems, clusters, repeat-blooming summer through autumn
  • Miniature Roses – very small and hardy bush with small leaves and flowers, repeat-blooming
  • Heritage or Old Roses – a very large group of roses grouped together because they were developed before 1867 (the date when the Hybrid Tea Rose was introduced).  Heritage Roses have a variety of forms in plant and flower.  Some are once-blooming, and some are repeat-blooming.  Some are hardy and some are not.  Many varieties of bloom shapes and colors.
    - Albas
    - Bourbons
    - Centifloras
    - China Roses
    - Damasks
    - Eglanteria
    - Gallicas
    - Mosses
    - Portlands
    - Etc
  • Tree or Standard Roses – This is more a style of rose than a specific variety.  If any rose is grafted onto a specially grown trunk (ranges from 1-6 feet tall), and formed into a “tree” shape, then it is considered a Tree Rose.

Bush Rose - Grandiflora: Wild Blue Yonder

Bush Rose - Miniature: Mixed variety

Heritage or Old Rose - Alba Rose: Unknown variety

Heritage or Old Rose - Bourbon: Louise Odier

Tree Rose: Weeping Pink


Landscape Roses
Another informal type of rose exists.  These are the Landscape Roses.  These roses have been developed to be easily cared for, very hardy, disease resistant, low maintenance, minimal pruning, and long, repeat blooming.  That is a lot going for them, for sure; however, they do lack the beauty, fragrance, history, and charm of the other more (and sometimes much more) demanding roses.  Examples include
  • Knockout – shrub rose
  • Carefree – shrub rose
  • Simplicity – shrub rose
  • Flower Carpet – groundcover rose
  • Blanket – groundcover rose
  • Bonica
  • Livin’ Easy – floribunda rose

Landscape Roses: Knockout Roses


Friday, October 21, 2011

Recycling Tires in Our Gardens... I Won't Do It


A classic tire planter

There has been a growing trend in "environmentally conscious" individuals to use old tires for a multitude of garden and household project.  While I am a huge proponent of recycling, reusing, and repurposing, (see my post on Permaculture Principle Six: Produce No Waste), I have a growing concern about the health risks of using old tires.

There have been a number of studies that have shown that using old tires may not be such a good idea.  There are two main issues with old tires.  First, tires contain heavy metals, zinc, rubber chemicals, vulcanization chemicals (from the process of vulcanizing rubber), and other pollutants.  Second, these potentially dangerous chemicals have been shown to leach from tires when placed in wet soil… like the wet soil found in a garden.  While it is true that whole tires will leach less pollutants than shredded tires, but it is still likely to occur no matter what form the tire is in.

Another garden planted with tires.

I don’t know if you’ve ever seen a dumped tire in a field or in the woods.  I’ve seen a number of these discarded, or illegally dumped, tires.  About half the time, I smell the tire before I even see it.  To me, this is just more confirmation that these tires are off-gassing or polluting the environment around them.

I wish I had a great answer for what we should do with old tires, but I don’t.  What I do know is that I will not be adding old tires to my garden, my food forest, or my land.

REFERENCES:


Thursday, October 20, 2011

Permaculture Plants: Malabar Spinach

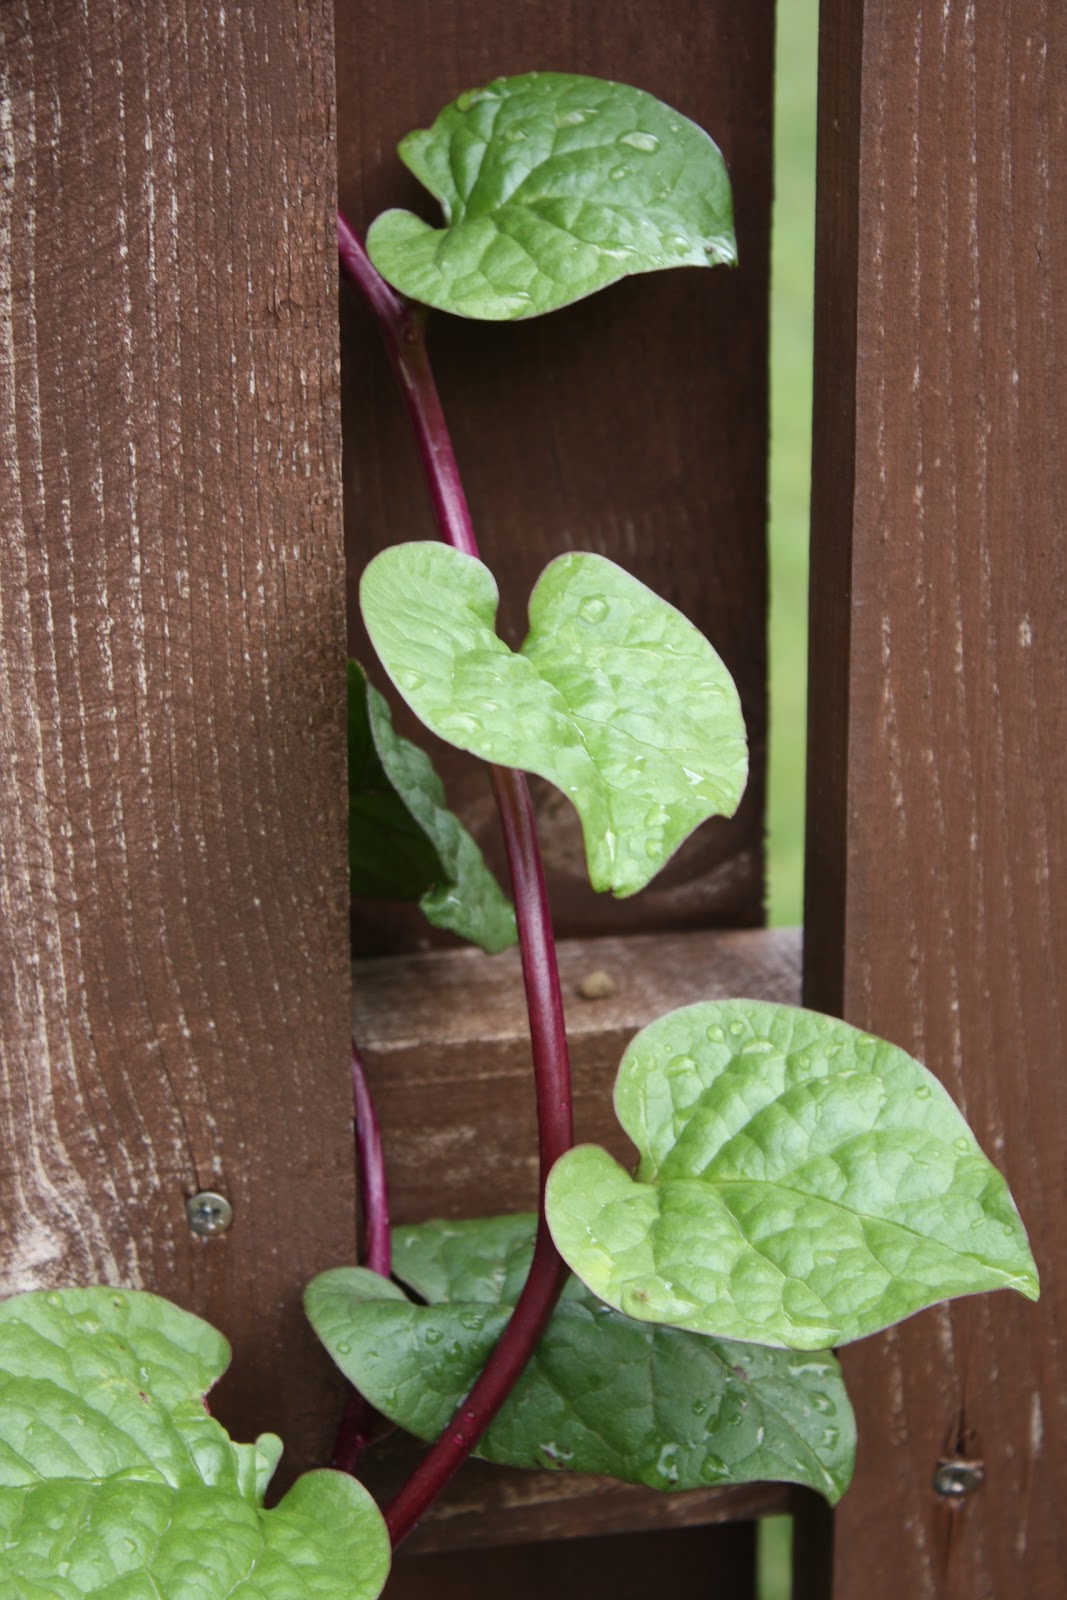
Photos of my Malabar Spinach

Common Name: Malabar Spinach
Scientific Name: Basella alba, Basella rubra
Family: Basellaceae

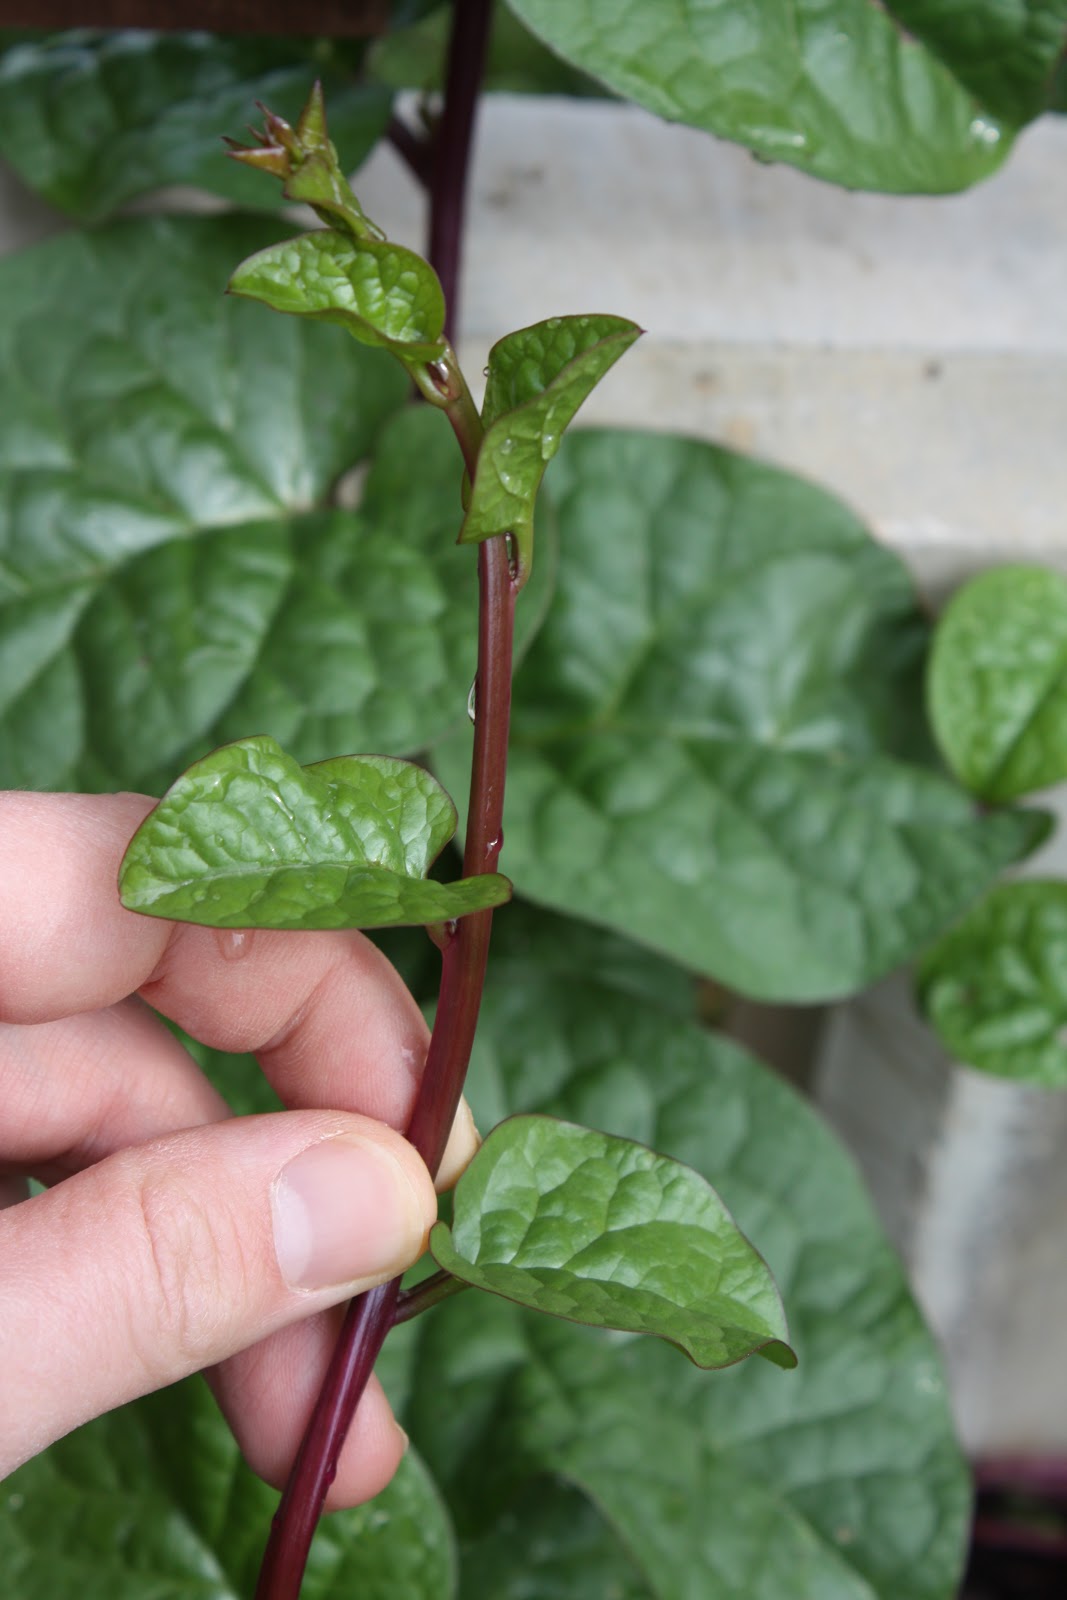
The tender leaves and shoots of Malabar Spinach are great fresh!

Description:
Malabar spinach is not actually related to spinach at all.  It is a heat-loving, vining, perennial plant with heart-shaped leaves from the tropics and sub-tropics.  It is often grown in more Temperate Climates as a heat-loving annual substitute for spinach.  It is considered a succulent (a plant that stores water in their leaves and stems), and it is used much like spinach, although I believe the taste is not very similar when raw.  Although when cooked, it does indeed taste like spinach.

It is said that Malabar Spinach has a mucilaginous texture.  This has a lot of negative connotations.  I think a better word is "slippery".  It actually has a very pleasant mouth feel to it.  I would describe it as crunchy and juicy when raw.  The taste is slightly peppery with a bit of a citrusy flavor with hints of earthy spinach to it.  Apparently, the red stemmed version (Basella rubra) is more mild in flavor than the green (Basella alba).  I have only grown and tasted Basella rubra, so I cannot speak from experience on the all green version.  As I said above, once cooked, it tastes much like spinach, maybe a little stronger.

History:
The name, Malabar, likely refers to the northern areas of Kerala state in India.  This at least is fitting, since it is thought that Malabar Spinach originated in India (although some research suggests Indonesia).  It is a very popular green vegetable in India, Southeast Asia, China, and Africa.

Trivia:
  • This is a great salad green replacement when the temperatures soar in the summer and our lettuces are wilting and ready to bolt.
  • Malabar Spinach is very high in vitamins A and C.
  • Malabar Spinach is high in calcium and iron.


Malabar Spinach using my fig tree as a trellis.

USING THIS PLANT
Primary Uses:
  • Fresh - Young leaves and the top 5-8 inches of shoots can be eaten raw.  Used in salads.
  • Cooked - Older leaves should be cooked as they have a rougher texture.  It is more like spinach in look and flavor when cooked.  It holds its shape a lot better than spinach when it is cooked.  Can be substituted for cooked spinach or chard.


Secondary Uses:
  • Thickening agent.  Here is where the "mucilaginous" part of Malabar Spinach is very helpful, kind of like okra, in soups, stews, and curries.
  • The red-purple juice from the berries can be used a a food dye and ink - it will stain!


Yield: Higher with more heat and with more pinching off of shoots and flowers
Harvesting: Whenever you want!  
Storage: Should be used immediately.  Does not seem to store well for more than a few days after picked.

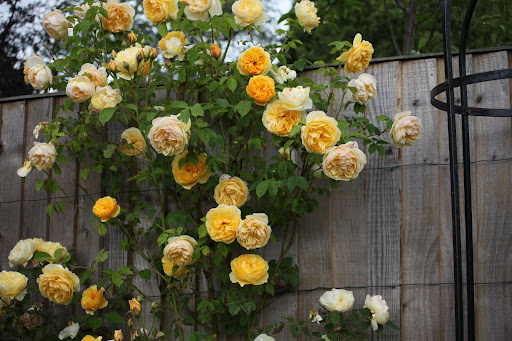
The deep red vines and pink flowers contrast beautifully with the dark green leaves.

DESIGNING WITH THIS PLANT
USDA Hardiness Zone: Killed by frost, although some report established plants can withstand 5 F (-14 C).

Plant Type: Vine
Leaf Type: Deciduous 
Forest Garden Use: Fast growing, heat loving annual vine in Temperate Climates.  Perennial vine in Sub-Tropical, Tropical Climates, heated greenhouses, or possibly as a potted indoor plant.  
Cultivars/Varieties: Basella alba is all green.  Basella rubra has red stems, is prettier, and is likely just a variety of Basella alba.
Flowering: Mid-Summer

Malabar Spinach is a fast growing vine.

PHYSICAL CHARACTERISTICS OF THIS PLANT
Size: 5-6 feet in a summer, easily.  Up to 12 feet in a long summer, and some report up to 30 feet if grown as a perennial.
Growth Rate: Fast if there is heat.  Large plant in 8-10 weeks.

Older leaves are a great cooked spinach or chard substitute.


GROWING CONDITIONS FOR THIS PLANT
Light: Prefers full sun
Shade: Tolerates light shade (about 50%), but grows much slower
Moisture: Medium
pH: Prefers fairly neutral soil (6.1 - 7.8)

Special Considerations for Growing: 
Give it something to grow on (trellis or tree) and your yields will be higher, easier, and free from dirt.

Propagation:  Pretty easily grown from seed.  Some will recommend soaking the seed in water overnight to improve germination rates, but I have not found that to be necessary.  Seems to prefer direct seeding when temperatures remain above 60 F (15 C), but I have transplanted with success.  Seeds can be saved from ripened fruit (small dark purple berries) - clean and dry the seeds.  Malabar Spinach is also easily grown from cuttings as it roots easily.

Maintenance:
Minimal.  Cut back severely to keep it in check if you live in a frost-free zone.  If there are no nematodes, then this plant has almost no pests.

Concerns:
  • If you live in a frost-free area, this vine can grow like crazy.  Some may call it invasive.
  • Reportedly susceptible to nematodes.
  • Reportedly susceptible to a fungus that destroys the leaves and can infect beets and chard as well.

Wednesday, October 19, 2011

Tiny Texas Houses


(all photos in this post from the Tiny Texas Houses website)


After my recent post on Tumbleweed Tiny Houses, I received an email from Jessie M. sharing another company making small houses.  This one is a little bit different though.

Brad Kittel started Tiny Texas Houses with the goal of showing how people could build small homes with 99% salvaged material.  By going out and reusing material others are ready to toss out or let rot, he has established a business that creates beautiful homes.  He obtains high quality wood, some of which are almost impossible to be found today, and builds a wide variety of homes that maximize space while minimizing square footage.  He also salvages doors, windows, glass, hinges, sinks, and tubs and reuses them in his home designs.


None of his houses are alike.  They may be based on a few similar layouts, but the final design is based on what is on hand from salvaged material.  Each home is a work of art.  They are high quality and built to last over a century.

If you are as interested in simplifying your life as I am, then a smaller home is just one way to make that happen.  Take a look at Tiny Texas Houses.  Enjoy, and be inspired, by some of these photos.  I am.


Tuesday, October 18, 2011

Permaculture Tips: Bird Feeder Sunflower Seed Catcher


From Organic Gardening “Weekend Garden Projects”


Bird Feeder Sunflower Seed Catcher
From Organic Gardening “Weekend Garden Projects”

A Permaculture Tip is an idea that is derived from observing and interacting with nature.  It is simple.  It is safe.  It is effective.  It helps build a sustainable system of agriculture and life in general.  If you have any Permaculture Tips you would like to share, please let me know.  I will post it here, give you the credit, and post a link to your blog or website if you have one.  Email me here: kitsteiner@hotmail.com

Attracting birds to our yards and gardens is an essential component of non-chemical pest control, it gives birds a reliable supply of food especially in the winter months, and it is just fun to birdwatch.  While we often attract birds with birdbaths and birdfeeders, we are hoping that they will also stick around to dine on some of those insects (bugs, beetles, caterpillars, etc.) that can wreak havoc on our plants.

Now, for those of us with birdfeeders, how often have you seen that one picky bird that knocks dozens of seeds out to get that one seed they are looking for, all others falling to the ground?

In general, I don’t mind this too much.  The seeds that fall to the ground are usually eaten by other birds, doves or jays that are too large to land on the birdfeeder, or squirrels that we can hopefully keep off the birdfeeder as well.  The more birds hanging around, the more secondary pest control.  Also, the more animals, the more manure which is always beneficial. (see my post on free bird manure)

The only problem are the sunflower seeds.  Sunflowers contain a chemical that inhibits the growth of other plants.  The scientific term for this is allelopathy.  Both the seeds and shells can inhibit growth of many plants, grass (lawns) included.

Blue Jays are notorious for knocking out seeds.


We can either use birdseed that have no sunflower seeds in it, or we can build a sunflower seed catcher.
The sunflower seed catcher is a simple solution.  Just hang a dome-shaped squirrel baffle upside down from the bottom of the bird feeder.  Attach an eye screw from the bottom of the birdfeeder.  Attach a S-hook to each end of a wire.  Attach one S-hook to the eye screw and one S-hook to the upside down squirrel baffle.

Birds and squirrels can go into the squirrel baffle and eat the spilled seeds.  When all the seeds are empty, we can simple pour the shells out.  Dump the shells in a place that you don’t mind inhibiting plant growth.  The chemicals will eventually degrade over time.


Monday, October 17, 2011

Recipe and Permaculture Tip: One-Minute Bread

An ridiculously easy recipe for a great loaf of bread!

Here is the list of ingredients... yes, that is it.


A good friend of mine (Jake) sent me this link quite some time ago.  This is a simple bread to make, and it is really quite good.  It obviously takes more than just one minute to make the bread, but the active amount of time you are really doing anything with this bread is under ten minutes.

There really are only four ingredients.  I use one bread yeast pack which is the 1/4 teaspoon required.  You can add any number of spices if you want at the end.

I will use this recipe when I want something that is a bit more bread-like than my Beer Bread but less time and quantity than the Artisan Bread in Five Minutes a Day.  It is great served with a good quality cheese or sliced thin lengthwise and used for sandwiches.

It is so easy!

Permaculture Tip
This tip was told to me by Jake (who sent the link above) a few months after sending me the bread recipe.  

For all you homebrewers out there...  You know when you are done fermenting a batch of beer and you have that stuff left over on the bottom of the carboy?  The technical term is "trub" (it comes from the German word for lees).  Well, this sediment that remains is composed of heavy fats, proteins, and inactive yeasts.  Jake and his friend were sitting in the kitchen cleaning up after bottling a batch of beer.  Jake's friend says, "I bet you that stuff there would be great in bread."  He was right!

This was a brilliant "ah-ha!" moment.

Now, whenever I drain the beer off the trub, I always save it.  I try to use it later that night.  I will substitute one cup of water for one cup of trub in the recipe listed above.  Sometimes I'll use a little more.  I may need to add a bit more warm water to get the consistency of the dough right.  Just experiment and see what works.

We will end up with a richer, more complex-tasting bread that has an amazing flavor.  This is a implementation of Permaculture Principle Six: Produce No Waste.  What we have been throwing away, discarded as waste, is an amazing ingredient in bread adding nutrition and flavor.  What a great idea!

Thanks, Jake!


Permaculture Tip is an idea that is derived from observing and interacting with nature.  It is simple.  It is safe.  It is effective.  It helps build a sustainable system of agriculture and life in general.  If you have any Permaculture Tips you would like to share, please let me know.  I will post it here, give you the credit, and post a link to your blog or website if you have one.  Email me here: kitsteiner@hotmail.com

Friday, October 14, 2011

Moths of the Walnut Tree


The stunning Luna Moth

One of my most vivid memories as a young boy is from a rare family vacation that we took to North Carolina.  My father had rented a cabin in the mountains, and the whole family went for about a week in the late summer/early autumn.  One evening we were out on the porch, and I was amazed and enthralled with the number and variety of moths that were attracted to the floodlight over the door.  There were dozens of different types of moths fluttering around or just resting within the halo of light.  One moth in particular seemed to be the size of a dinner plate and appeared to almost glow with a brilliant, shimmering green.  It was docile and calmly climbed onto my hand.  I was giddy with excitement.  I believe the next day, when we went to town, my father bought me a book on insects.  To be honest, I can't recall if the purchase of this book actually took place on this trip or after we got back to Florida, but I am pretty sure I had the book while we were on the trip.  The ephemeral green creature was identified as a Luna Moth, and it was in reality a bit smaller than a dinner plate.  However, I cannot see a Luna Moth, or really any brightly colored moth in the evening, without fondly remembering that night on a wood porch in North Carolina.

The Luna Moth is a gentle giant.

A younger and older Luna Moth caterpillar 


This post was prompted by the recent article I posted on the Walnut Tree - check it out here.  There are two species of moth that use the Walnut as a primary food source.  One is the aforementioned Luna Moth, and the second is the beautiful Regal Moth.  The Regal Moth caterpillar is a frightening looking creature.  It is, however, completely harmless.  These two amazing animals are ones to watch for if you have Walnut Trees and live in the eastern United States.  Remember Permaculture Principle One tells us to Observe and Interact.  Seeing these animals is part of the fun of observing.

Amazing colors on the Regal Moth


The terrifying, but harmless, Regal Moth caterpillar.

Close up of the Regal Moth


Thursday, October 13, 2011

Beer and Food Pairing

Crab Rotini and Cheese paired with the organic amber ale, Monk in the Trunk
Just one of many beer and food pairings from The Beer Cook

I have to give credit to my brother Ray for sending me a link to The Beer Cook blog.  This is a blog written by a young woman who loves beer and food.  Her blog is not fancy, but it is very inspirational, and it has great photos.  I really recommend taking a look at it.  Seriously, it is really fun.

After perusing this blog for a bit, I really wanted to see what else was out there on the web dealing with Beer and Food Pairing.  There are many full books written about food and wine pairing, but unfortunately the beer and food pairing research is still in its infancy.  Hopefully my research will save you some time looking and give you more time experimenting and enjoying!

When you are done reading about all these specialty beers, I have to ask... do you really need even more motivation to start brewing your own beer?


Beeradvocate Beer and Food Pairing Guide:  A great little pairing search engine.  You select the style or type of food from a drop down menu, and you get few to a couple dozen beer style choices with some specific brands from which to choose.

Brewers Association Craft Beer and Food Pairing Chart:  A handy, single-paged PDF that lists the Beer Type with a graphical description and then recommendations for Suggested Foods, Cheese, and Dessert pairings.  Also provides glassware recommendations and serving temperature suggestions.  Love this!

Samuel Adams Food and Beer Pairings:  I had to include this Beer and Food Pairing guide.  First it is well done.  You can search by which Sam Adams beer you have, and you will get food choices; or you can search by what you are eating, and you will get Sam Adams beer recommendations.  Second, I really like Samuel Adams, their philosophy, their history, and of course their beer!

Artisanal Premium Cheese Beer and Cheese Pairings: You select the beer style (by clicking on the photo) and they will link you to a short cheese pairing tip page with suggestions of cheese you can buy from them.  This is the best guide I found for recommendations on pairing beer with cheese.


Finally, here are a few articles on Beer and Food Pairing:

The Art of Picking the Perfect Beer for a Meal - Cheyl Lu-Lien Tan (Wall Street Journal)

There's Room at the Table for Beer, Too - Joshua Bernstein (Imbibe)

Beer Pairings Menu - Lucy Buringham (Oregon Live)

How to Have a Beer-Pairing Dinner at Home - David Hagedorn (The Washington Post)


Wednesday, October 12, 2011

Permaculture Plants: Other Walnut Species


A beautiful Butternut Tree in Ottawa, Canada.


Common Name: Butternut, Long Walnut, White Walnut
Scientific Name: Juglans cinerea

Cultivation information is the same as for the Black Walnut except that which is mentioned below.

Butternut Nuts

Butternut (bottom) compared to Black Walnut (top).

Butternut (top) compared to English/Persian Walnut (bottom).

Butternuts have a leaf appearance much closer to English/Persian Walnuts.
Black Walnuts have 15-23 leaflets
Butternuts have 11-19 leaflets.
English/Persian Walnuts have 5-9 leaflets.


Description:
Butternuts are one of the most cold hardy of all nut trees in the world.  Native to eastern North America.  They have very strong and light wood.  Butternuts are said to be shorter lived than the other walnut species.  Some varieties are easy to crack and others are very difficult, but they have a very good, almost buttery, nut flavor.

May take 20 years to begin producing, although some begin producing much sooner.  Butternuts typically produce one large crop every second or third year and smaller yields in between.

Butternuts are self-pollinating (self-fertile), but may produce higher yields with cross-pollination.

Butternuts can become bushy, so pruning to a strong central leader is recommended if you want a more “treelike” appearance.

Trivia:
  • NOT resistant to the walnut canker (from the fungus Sirococcus clavigignenti-juglandacearum).
  • Butternuts are fairly intolerant of shade.
  • Listed as "Threatened" in Tennessee and of "Special Concern" in Kentucky.

USDA Hardiness Zone: 3-8
Size: 40-90 feet tall and 35-60 feet wide

__________________________________________

Common Name: Heartnut
Scientific Name: Juglans ailantifolia var. cordiformis


Cultivation information is the same as for the Black Walnut except that which is mentioned below.


Heartnut Nuts


The Heartnut Tree


Description:
Heartnuts are a Japanese species of walnut.  They are much closer to Black Walnuts than English Walnuts, but they maintain the superior flavor of the English Walnut.  Heartnuts are also very easy to crack.

May take 10 years to begin producing, though many produce much sooner.  Heartnuts may produce one large crop every second or third year and smaller yields in between.

Trivia:

  • Resistant to the walnut canker (from the fungus Sirococcus clavigignenti-juglandacearum).
  • Closely related to the Butternut (Juglans cinerea) above.
  • The Heartnut lacks the bitter aftertaste of Black and English/Persian Walnut nuts.


USDA Hardiness Zone: 4-6
Size: 50-90 feet tall and 35-50 feet wide

__________________________________________

Common Name: Buartnut
Scientific Name: Juglans x bixbyi

Cultivation information is the same as for the Black Walnut except that which is mentioned below.

Buartnut nuts on the tree and husked.

Description:
Buartnuts are a fast-growing cross between the Butternut and the Heartnut.


Trivia:

  • Resistant to the walnut canker (from the fungus Sirococcus clavigignenti-juglandacearum).
  • Buartnuts are easier to shell than its parents.
  • Can grow up to six feet in a year.
  • Start producing nuts in 3-6 years... much earlier than its parents.


USDA Hardiness Zone: 4-7
Size: 50-60 feet tall and wide