Showing posts with label Permaculture Projects. Show all posts

Friday, March 23, 2012

Permaculture Project: Planted Compost Circle

The "Banana Circle" is a classic, but tropical, design.

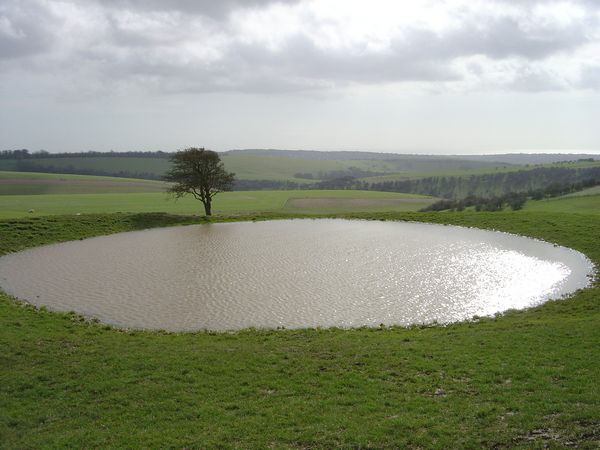
The Banana Circle is a classic Permaculture design. A circular pit is dug. The soil from the pit is used to build up walls around the pit. Bananas are planted in the wall. Any and all organic matter that would be added to a compost bin is added to the center of the pit. Over time the organic matter breaks down and provides a fantastic nutrient supply to the growing (and nutrient hungry) banana plants. This design illustrates Permaculture Principle Eight: Integrate Rather Than Segregate. This design integrates a compost pile and a food producing crop planting into one structure. This design automatically fertilizes itself as the organic matter breaks down into compost. This design protects from drought by having a huge pile of organic matter (which absorbs and stores large amounts of water) right next to the banana's roots. This design is brilliant!

But it is tropical.

Yes, I have a few banana tress in my backyard right now, but I'm moving in a few months, and I don't suspect I'll ever live in the tropics or sub-tropics again. 

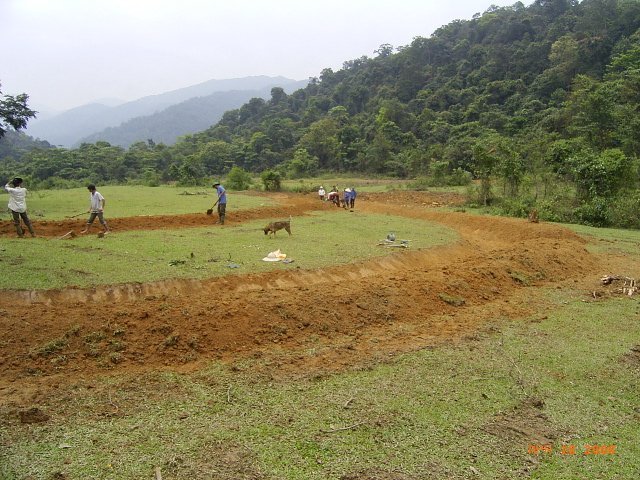
One similar method that is being used with annual vegetable gardening is the Tomato Circle. The same basic premise is followed as the Banana Circle... a central compost pit with tomatoes growing all around. I particularly like the one design shown below. Note the "pit" is really more of a circular trench with a drain. This allows more focused water collection closer to the plants, but still allows an escape if too much water collects.

But this is for annuals.

A "Tomato Circle" is a growing trend.

So how can I incorporate the concept of a Banana Circle in more temperate climates using perennial plants? I have yet to find anyone designing Planted Compost Circles (I don't know if there is an official name for these designs, so this is what I call them). I wanted to get a few of my ideas out there, and maybe spark better ideas from others. Here is what I have so far:

  • Mixed Berry Circle - a few each of Goji, Goumi, and Nanking Cherry.
  • Bramble Circle - a mixed variety of blackberries and raspberries.
  • Gooseberry Circle - a mixed variety of Gooseberries
  • Blueberry Circle - compost can be heavy on the "acid" content (i.e. pine needles).

As I come across more, or better, ideas, I'll post them here.

Tuesday, November 22, 2011

Permaculture Projects: Structures for Overwintering Insects


I was going through some photos of a trip we took to Germany.  We brought the kids to a wildlife park.  In Germany, the wildlife parks are large, relaxing managed forests with extensive paddocks for animals.  They are a great place to leisurely enjoy nature while seeing a lot of animals.  The kids and adults love it.


One of the things we saw was this structure pictured at the top of this post.  It is a collection of insect homes.  The small burrows drilled in wood or crevices in brick, straw, pine cones, and sticks are a fantastic place for beneficial insects to overwinter.  


You can see in this close-up that some of the ends 
of the small bamboo sticks are covered with mud.
These sticks are currently inhabited!

We often keep our yards and gardens so tidy that our beneficial insects have no place to go for the winter. They end up either freezing to death or migrating out of our yard and into a place that is more suitable... never to return.  

By providing homes like these, we can increase our chances that the beneficial insects will stick around year after year.  This reduces our pest issues, and it reduces our need to import beneficial insects.


Tuesday, October 11, 2011

Permaculture Projects: Flower/Plant Press


A simple, and simple to make, flower and plant press.

This is a project I plan to implement as soon as I can after moving to my land – the land I have not bought yet!

I love botany.  I love just about all there is to do with plants.  But, gosh, there are a lot of them!  I know I am much better than the average person at identifying plants; however, there is so much that I do not know.  One of the problems I have found with living all over the world, is that I have never become very good at identifying more than a handful of plants native to that one area.  Certain plants, especially certain species or genus of trees, are common enough that I can identify them fairly easily, but when it comes to shrubs and wildflowers… that is where I am at a lost.  I can only say, “Hey look at this… pretty, blue flower!”  so many times before it really bothers me that I do not know that name of it.

Orange Coneflower (Rudbeckia fulgida) specimen page.

My goal is to document every plant on my land.  I want to be able to identify it and know it like an old friend.  One way I am going to do this is with a plant/flower press.  I want to collect leaves, flowers, seeds, and fruit (if produced) from every plant on my property.  For fruit or other parts that will spoil, I plan on taking photographs.  Well, actually, I plan on taking photographs of everything specimen as well, but there is so much more you can get from a dried specimen than you can from a photograph.  Ideally, I will have the dried specimens mounted on a small piece of cardboard, sealed in plastic with a desiccant, labeled, and placed in a “catalog” along with photos and documentation of the cultivation and natural history of that plant - my own small herbarium.

Beautiful specimen page of a rare tree from Australia.
Grampians Gum (Eucalyptus verrucata)

Do I need to go to this trouble?  By no means.  However, I think it will be a fun project.  I think it will guarantee that I know and can identify the plants on my land. It will make me do the research to identify every possible function of that plant that may be beneficial to me – one of the goals of Permaculture.  I think it will be a great way to teach my kids the science of taxonomy and identification and the skills of photography and plant preservation.  It may also produce some beautiful pieces that blur the line between science and art.

This plant is native to Asia but has escaped cultivation in the U.S.
Glossy Privet (Ligustrum lucidum)


Thursday, September 29, 2011

Permaculture Projects: Composting

The Classic Compost Bin

I received a comment on Facebook asking me for resources on composting and vermiculture (worm composting).  My initial thought was that I would write a quick post on composting.  I would then do some more research on vermiculture before I wrote that post since I have yet to do any vermiculture myself.  However, the more I thought about it, the more I realized that what I have done and know to do is more complicated than just a simple post.  Instead, what I thought I would do is share some of my basic thoughts on composting, and then share some of my favorite resources on composting.

When I have time, I will go back and write about what I have done specifically with composting, the variations/experimenting I have done, and the lessons I have learned.  I will also write a post soon about vermiculture - it is really cool!

There are a couple of things I want to point out first...

One of the many modern (and pricey) compost tumbler designs.

Mesophilic Composting
Mesophilic (ME-zoh-fill-ick) composting is composting done at temperatures that are warm but not too hot.  This is what most people think of when someone says "compost pile".  This is how most backyard composters expect to run a compost pile or bin.  Certain things that can be pathogenic (disease causing) should not be placed in a mesophilic compost pile.  These are things like meat, bones, cooking oils, animal and human feces, diseased crops, etc.  The temperatures typically do not maintain a high enough temperature for long enough to kill the pathogens potentially found in these items, so they should be avoided.

Thermophilic Composting
Thermophilic composting is composting done at very hot temperatures.  Thermophilic composting has been proven (over and over in many research studies) to kill all known human pathogens (parasites, bacteria, viruses, etc.), all known plant pathogens, and all weed seeds.  All home or "backyard" composters have the ability to easily make their mesophilic compost pile a thermophilic compost pile.  You just need a bit more space, plenty of moisture, plenty of aeration, a good C:N ration (that's carbon to nitrogen ratio - read all about this in the links below), and plenty of time.  A thermophilic compost pile should sit for at least a year before it is used.  If you have the time and the space, then this is the type of composting I would highly recommend.  You can truly recycle all organic material.  Period.  It is the most efficient and resource conserving method of composting.  The Humanure Handbook, which I highlighted a few days ago here, extensively discusses thermophilic composting.

Composting and Permaculture
As this blog is about Permaculture, I need to say that composting is a no-brainer when it comes to Permaculture.  Permaculture Principle One (Observe and Interact) and Six (Produce No Waste) dovetaile nicely in composting.  If we observe nature, we see that in nature there is no waste.  Everything is recycled.  If we are trying to emulate nature, we should compost as much as we can.  This is just one way to be truly sustainable.


Get out and start composting!
Finally, if you are thinking about starting a compost pile, just get out there and do it.  You can learn as you go.  It is so easy.  You will feel good about doing it.  You will end up with a great resource that your plants will love!


Composting Resources:
www.composting101.com:  This is a good site for the simple basics of composting (also has a page on vermiculture).

www.epa.gov - Composting: This is the Environmental Protection Agency's information page on composting.  It is well organized and very extensive.  Excellent information.

www.epa.gov - Where You Live:  This is the Environmental Protection Agency's link page to each state's composting page. Yeah, pretty much every state has a composting page!

www.howtocompost.org: A really good site on composting.  It has a lot of its own information, but it also has a bunch of links to other pages on the internet.  Not as well organized as it could be, and some of the links are dead, but overall, there is a lot of good information on this site.


Friday, September 9, 2011

Rocket Mass Heater

A Rocket Mass Heater

I have been intrigued by Rocket Mass Heaters ever since I heard of them about a year ago.  So what exactly is a Rocket Mass Heater?  Well, it is a variation of a Rocket Stove (don't worry if you haven't heard of that either) combined with the concept of a Masonry Stove.

The concept is simple and brilliant.  Wood is burned in a uniquely shaped "combustion chamber" that burns wood very efficiently.  The heat produced from the burning wood heats up a large thermal mass (usually some form of bench).  By the time the exhaust exits the room, it is only about 90 degrees F (32 C).  The exhaust is mostly water and carbon dioxide. 

Let me show you an illustration of a Rocket Mass Heater for better understanding:
Illustration of a Rocket Mass Heater


What are the benefits of a Rocket Mass Heater?
  • Use a lot less wood for heating.  The amount depends on where you live, but you can expect about one fourth to one sixth of what a very efficient fireplace or woodburning stove uses to heat a room/home.
  • Almost no pollution.  The fire burns so hot and intense, that only water vapor and carbon dioxide is released.  And for you "Carbon Footprint" Nazi's out there, it is "carbon neutral".  Clippings from branches in the yard or from branches fallen out of trees or even from coppiced trees is all that is needed in most cases.  All that is left in the combustion chamber is a little bit of white ash.
  • Better at keeping and sustaining heat.  Almost 90% of the heat produced stays within the home instead of being lost out the chimney.  The thermal mass can keep radiating heat for 12-48 hrs after the fire is out. 
  • Needs less tending.  As the heat is radiating long after the fire is out, there is no need to tend the fire or watch for spitting embers.
What are the downsides to a Rocket Mass Heater?
  • You need to build it yourself.  There is no commercial version available now.
  • It is heavy!  The thermal mass being made mostly of clay/adobe is weighs a lot.  You can't just install these anywhere.
  • It uses clay/adobe.  For some, this is great.  For others, well, let's just say a Rocket Mass Heater doesn't blend will with a New World Colonial Design.  (I actually have no idea if that is a design style or not, but it sounds pretty good!)
  • They take a while to warm up.  A big thermal mass can take up to 4 hours to heat up (but then it will retain heat for a long longer as well).
  • Building codes don't really know what to make of this yet.  It is a relatively new concept (2004 as I can best tell from researching it).
  • You can get some "smoke back" when initially lighting the wood or if the Rocket Mass Heater is not designed well.

WARNING: Sloppy hippy alert.  As is often the case, it is the more eccentric individuals who are the first to attempt/try new innovative projects like a Rocket Mass Heater.  These individuals are usually hippies.  These hippies are usually very messy or sloppy individuals who leave piles of junk all over the place.  Unfortunately, it is hard for many people to see past this chaos and find the gem underneath.  In my opinion, a Rocket Mass Heater has an amazing potential for energy savings.  I think they need to be made a lot more attractive before they will be adopted on a more widespread scale, but what an amazing concept!

Here is a pretty good video that highlights a number of Rocket Mass Heaters (with the aforementioned sloppy hippies).  It was done by Paul Wheaton of Permies.com.


This is just an introduction to the concept of Rocket Mass Heaters.  I plan on providing more detailed information in the future. Stay tuned!

Thursday, August 11, 2011

Gabions for Creek Restoration

Gabions acting as a retaining wall.


Gabion is a word that comes from Italian meaning big cage.  In typical civil engineering use, a gabion is a cage or box filled with sand, soil, or rubble used to stabilize a slope, build a retaining wall, build a foundation, or direct flow of water especially to prevent erosion.  The military will uses gabions to protect artillery crews from enemy fire.

Gabions used to prevent water erosion.

I recently came across the following video showing how gabions are being used to restore a creek and surrounding riparian zone and vegetation.  (Riparian = the interface between land and river or stream)  In this case, the term gabion is loosely applied to piles of rocks and trees.  These piles form a leaky dam.  The water upstream builds up, the water level rises, and the water irrigates the surrounding land.  The water downstream initially slows down, but soon after construction the water leaks through the gabions and flow returns to previous levels.  This allows a landowner to utilize water more efficiently.  Also, by keeping the downstream flow unchanged, no downstream neighbors can complain.  

This is a beautiful system that builds ecosystems.  It is a great example of Permaculture in action.  Here is the video from the Permaculture Research Institute of Australia:


Monday, July 18, 2011

Dew Ponds or Dieu Ponds

Dew or Dieu Pond

There is an air of mystery surrounding these small water storage ponds that dot the English countryside. They seemed to possess a magical ability to fill and retain water in the hills and higher elevations without a visible water source.  Even their name is a bit of a mystery.  Called "Dew Ponds" by some, they are also less frequently called "Dieu Ponds", "Fog Ponds", and "Mist Ponds".  Whatever their proper name, these small ponds are a fantastic Permaculture Project for collecting and storing water.

No one knows for sure when the Dew Ponds were first built in England, but according to folklore they were said to be filled by the nighttime dew (they are also known as "mist" or "fog" ponds for the same reason).  Others have said that they were filled with water sent by Dieu, French for God, himself.  These Dew Ponds were possibly being built as early as the first century A.D., and about 500 are still in existence in England today.  Most of these Dew Ponds still rarely run dry, even in the hottest summers of drought. 
A full Dew Pond
They were most likely created for watering livestock at the top of hills or in "high country" where no water source was readily available.  Historically construction of Dew Ponds were a closely held secret passed on only after years of apprenticeship or between fathers and sons.  While there was a mystical quality to the creation of these ponds, there are a number of sources from the late 1800's and early 1900's that describe their construction in a detailed manner. 

From the wikipedia article on Dew Ponds:
A Sussex farmer born in 1850 tells how he and his forefathers made dew ponds: “The requisite hole having been excavated, the chalk was laid down layer by layer, while a team of oxen harnessed to a heavy broad-wheeled cart was drawn round and round the cup shaped hole to grind the chalk to powder. Water was then thrown over the latter as work progressed, and after nearly a day of this process, the resultant mass of puddled chalk, which had been reduced to the consistency of thick cream, was smoothed out with the back of a shovel from the centre, the surface being left at last as smooth and even as a sheet of glass. A few days later, in the absence of frost or heavy rain, the chalk had become as hard as cement, and would stand for years without letting water through. This old method of making dew ponds seems to have died out when the oxen disappeared from the Sussex hills, but it is evident that the older ponds, many of which have stood for scores of years practically without repair, are still more watertight than most modern ones in which Portland cement has been employed.”

Dew Pond in South Downs, England

In more modern times, Dew Ponds are still built in a pretty similar manner.  There are so few people building these ponds now, and there are many variations on the theme, but the following is the best I could compile on how to build one.  Dew Ponds are dug where there is already a mini-catchment or a small depression, typically on the top or side of a hill.  They are typically anywhere from 3 to 30 feet in diameter, but up to 70 feet are not uncommon.  The ratio of width to heigth is 3 to 1 at a minimum, and the depth is usually no more than 3-4 feet.  The hole is then lined with straw or hay for insulation.  Then puddled clay or chalk (puddling is the process of adding water to clay or chalk, and pounding it down or otherwise compacting it until it is waterproof) is laid on top the straw.  Often soot or lime is added to the clay to deter earthworms from trying to burrow through the waterproof layer of puddled clay.  This is then covered with another layer of straw, then chalk and small stones.  If being used for animals, it is recommended that large stones are placed from the edges at the low side to provide access. Both the small and large stones are used to distribute the animal's weight and prevent a hoof from breaking the watertight seal.
So from the surface down, the layers would look something like this:
  • Water
  • Large Stones (weight distribution/protection)
  • Small Stones (weight distribution/protection)
  • Chalk or Clay (protection)
  • Straw (protection/insulation)
  • Puddled Clay or Puddled Chalk, possibly mixed with soot or lime (watertight layer)
  • Straw (insulation)
  • Earth
  • One cross-section illustration of a Dew Pond.

Research has shown that Dew Ponds are mainly filled with rainwater and only supplemented with water from dew.  Their small size and insulation keeps the pond cool which inhibits evaporation. Many ponds have one or more trees at the edge which also keeps down evaporation.

Dewpond on Ascension Island, Saint Helena
St. Helena is a territory of Britain
Dew Ponds are a great way to collect and store water.  Check out these other articles on collecting and storing water... all ways to cut back on irrigation needs:

Saturday, July 16, 2011

Hypermiling: Ways to Save When You Don't Have a "Green" Car

Hypermiling (Hyper-mile-ing) is the art of driving economically and exceeding vehicle manufacturers stated efficiency by modifying driving habits and techniques.  - http://www.hypermiler.co.uk/

In this era of increasing fuel costs and shortages of petroleum-based fuels (see my post on Peak Oil), hypermiling is a brilliant concept that will help you save money.  There are a number of websites and articles written about this, so I will not reinvent the wheel.  Today, I'll just provide links to what I consider the more high yield sites:

CNN Article on Hypermiling

Overview of Tips for Hypermiling - Not the best website (cluttered with ads), but the information is solid.

Hypermiling Tips from the UK Hypermiling website


CNN Video on Hypermiling

Wednesday, July 13, 2011

Permaculture Projects: Free Bird Manure


I was running through my neighborhood this morning, and I noticed something.  There are trees lining the road through one area I was running, and on the road under every tree was a fairly substantial ring of bird droppings.  I looked ahead down the road, and there appeared to be little white halos on the ground surrounding the trunk base of every tree.  Between the trees, the road was clean.  It hasn't rained here for quite a while, so the droppings have had some time to build up.

This made me think of a few things things.

First, it reinforced the concept of Edge.  The individual bird droppings were very small.  That means it was the manure of the small finches, sparrows, and chickadees that are all over the place right now.  I am thinking that they must be roosting in these trees at night.  In nature, these small birds are the inhabitants of the edges between field and forest.  From my previous post on the Importance of Edge, I discussed how the edge is booming with life.  Well, this is just another reason why.  These small birds are constantly fertilizing the edge.  What a brilliant design for us to model.

Second, along the lines of modeling nature... which is what Permaculture is all about!  I have heard of many people who have bird feeders and bird waterers and bird houses and bird perches scattered throughout their yards.  But these individuals have noticed that the plants (usually grass) growing under these structures will grow much better than the surrounding areas.  So every year, they will move the locations of these structures to spread the fertilizer around a bit.  Then they also get the added benefits of pest control (birds eating the pests), increased biodiversity (every addition of another species will almost always be beneficial), and increased beauty (these birds are just fun to watch!).

Third, this is is why Principle One: Observe and Interact is so important.  If I was just in my running zone listening to my Ipod, I never would have noticed this and been spurred to share.  Now, I also saw a small crab on the road.  Yeah, a crab.  We are nowhere near a body of water... I'll have to think about that one. :)

Finally, I thought what a waste.  All that rich nitrogen is going to be washed down the sewer system with the next rain.  This also reminds me of another thing... My boys are little right now and are just getting potty trained.  We can be outside playing and they will have to pee two or three times an hour sometimes.  I have taught them that if we are in a natural setting, they can pee in the bushes or behind a tree.  Our interaction goes something like this:  "Daddy, I need to go pee-pee!"  "Again?  Right now?"  "YES!"  "Okay"  "I want to go pee-pee in the bushes (or on a tree)"  "Okay, which bush needs your nitrogen?" (yes, :) I actually say that!)  They will look around and say "Hmmmm, I think this one is a good one."  And then the nitrogen delivery is made.  I love it.  My boys love it.  And I am pretty sure the plant enjoys it as well.

Observe nature.  Smart design.  Minimal work (interaction) on our part.  Let nature do the bulk of the work.  Great results.  That is Permaculture!

Friday, July 1, 2011

Permaculture Projects: Attracting Bats

The Little Brown Bat.
The most common bat in North America.
3-4 inches long and less than 12 inch wingspan.

Attracting bats?  Oh, yeah!  I love bats.  Hopefully, after reading this post, you will at least gain an appreciation for this much maligned denizen of the night.

In the last few weeks, there has been a huge increase in mosquitos where I live.  Last year at about this time, I could watch the bats hunting at night.  This year, I haven't seen any bats.  I am hoping that this is just temporary.  I have had to treat cellulitis from infected mosquito bites about five times in the last week alone.  I have never before had this many infected bites clustered in a short time like this.  There are real consequences to not having bats in your local area, and this is just one of them.

The beautiful Hoary Bat.
A common North American bat, and the only bat in Hawaii.

Quick Bat Facts:
  • Bats are the number one predator of insects.
  • One bat can eat 2,000 - 6,000 insects... per night!  Reread that last sentence.  Wow!
  • In one summer (let's say 90 days), that is over half a million insects... for one bat!
  • Bats are the primary pollinator of the agave plant.  Tequila comes from agave.  No bats... no tequila!
  • Vampire Bats do exist... not in North America, and they are quite rare.
  • About half of all bats are endangered or threatened... primarily due to loss of habitat, pollution, and human persecution.
  • Bats rarely contract rabies... less than 40 people have gotten rabies from a bat in the last 50 years.  Worldwide, over 50,000 people die each year from rabies, and the most common vector is dogs.
  • Bats are not blind.
  • Bats are not attracted to humans, and will avoid humans at all costs.
  • Bat guano (manure) is a great fertilizer with a very high concentration of nitrogen.

Townsend's Big-Eared Bat.
Endangered in Eastern North America

I have stood in a field both in Nigeria and in Turkey with bats swooping all around me.  They were feeding on the insects flying over the fields just after dusk.  I could feel the breeze a few times as they flew close, but they never touched me.  I am talking about dozens of bats in a small field, in the dark, with no collisions with me or each other while picking insects out of midair.  They are amazing flyers!


Installing a bat house!

Attracting Bats
How do you attract bats to your property?  Build bat houses!  This will keep insect populations down in your local area and will provide you with a source for great compost.

The Organization for Bat Conservation is a great resource for information on bats.  They also have free plans for building bat houses as well - click here for a link to their PDF download page.

Here is a great interview with the Rob Mies, the co-founder and director of The Organization for Bat Conservation.  Aired on The Survival Podcast.

Not all bat houses will be used.  If you live in a cool climate, they may stay in the bat house for the spring-fall, but will hibernate somewhere else.  Where you place the bat house is determined by where you live.  Again, The Organization for Bat Conservation has a great page explaining where to place your bat house.

The Spotted Bat
An elusive and little known bat of North America.

So, I am a huge fan of bats.  They are a huge asset and, to me, an integral component of a well-designed Permaculture System.  Consider attracting bats to your property today!

Friday, June 24, 2011

Permaculture Projects: Hugelkultur

Anatomy of Hugelkultur

What is Hugelkultur?
This is a German compound word - aren't they all?
It translates as mound/hill (hugel --> WHO-gull) + culture/cultivation (kultur --> cull-chur).

Hugelkultur is making raised beds that are filled with rotting wood.  It is such a simple concept, but it is an amazing method to use.

Wood pile core of a hugelkultur bed

Benefits of Hugelkultur
  • Full of slowly decomposing organic matter
  • Full of nutrients.
  • Builds fertility over time.
  • The rotting wood is a massive sponge for water (read that: very little or sometimes no irrigation needed - fantastic method of water harvesting/preservation).
  • Heat from the decomposing wood helps create a warmer microclimate
  • It will last for YEARS!  30 years for a deep bed is not unheard of in climates without a high rainfall.  10-15 yrs for a deep bed in areas with high rainfall.  5 yrs or so for shallower beds.  As the bed ages, it will slowly shrink further and further down to the ground.

Side by side comparison of growing cantaloupes - seeds from the same packet!
Left - traditional garden method; Right - a very shallow hugelkultur bed
Look at the difference!

Creating Hugelkultur
Find your woody material.
This can be downed trees, old firewood, pruned branches and twigs, rotten logs, etc.
Wood can be fresh or rotting.  Rotten wood does decompose faster.
Just about any wood can be used.  Paul Wheaton recommends against Black Locust (since it almost never rots!), Cedar (it has natural pesticides and herbicides), and Black Walnut (contains a chemical that prevents plants from growing near it).

Mound your woody material
Lay the wood in a long mound.
It can be any height you want it to be.  1-2 feet is common in backyard gardens, but Sepp Holzer builds his mounds 5-6 feet high.
You can also lay the wood in a dug trench, so that the total height is not as high above ground level.

Cover your woody material
If you are not going to plant immediately, you can add additional compostable items: grass clippings, manure, kitchen scraps, garden waste, sod, etc.
Cover with a few inches of soil and/or compost.

Plant your mound
That's it!

Sepp Holzer's Raised Bed System... really a form of Hugelkultur
Please click on the diagram or link below to see a larger image.
Concerns about Hugelkultur
If you are using fresh wood, there is concern that nitrogen will be sucked into the wood during initial stages of decomposition.  While that is technically true, it appears that this system either mitigates that due to a concurrent release of nitrogen or due to an unknown mechanism unique to this technique.  Either way, people plant vegetables (high nitrogen utilizers) right away into brand-new hugelkultur beds all the time with fantastic results.

Check out these pages:

Thursday, June 23, 2011

Permaculture Projects: Swales

Swale Design

Permaculture Swales
In Permaculture, a swale is a method used to harvest rain water.  They are long shallow trenches that run along the contour of the land.  This means that swales are perfectly level.  Swales do not direct water flow, but they collect water.  The soil removed from the swale is piled on the downhill side to make a slightly raised bank or berm.  When rain falls, the water runs along the surface of the topsoil, and it will collect in the depression of a swale.  The water will slowly seep into the soil and collect in underground pockets that will supply the roots of plants through weeks and even months without rain.

Illustration showing the water storage of a swale - from Gaia's Garden

If rainfall is heavy or fast enough, the water will also slowly seep into, through, and maybe overflow the berm.  Since the swale and berm are level, the water gently slips over the edge, and no erosion takes place.  The water then travels downhill to the next swale.

Plants are planted in the downhill berm.  The roots keep the berm in place, and the water provides moisture to the plants.  Water loving plants can be placed further into the depression of the swale, and plants that require less water can be placed further downhill of the berm.

As time goes on, rain and wind will continue to push and carry silt and other debris into the swale which will slowly build up a compost-like rich soil.  This will only continue to benefit the plants near the swale.

Swale design by Bill Mollison

Swales can be very large or very small.  They can cover large fields or small yards.  The key to making swales is keeping the swale level.  There are many techniques for doing this.  Two handmade leveling devices are an A-frame Level and a Bunyip (water level) which were both used by the Egyptians.  If you have the ability, you can also use a laser level or other surveyor's tools.

The ancient A-frame Level.
Here is a link to a PDF that shows how to use an A-frame Level.

A great video on making a Bunyip (water level)


Using the Bunyip (water level).
When the reading is the same on both sides, then the base of one stick is on contour (is level to) the other stick.  Mark a line with chalk or paint or string from one stick to the other, and you have marked the contour of the land.

The distance between swales is really determined by rainfall.  Swales should be closer together in areas with high rainfall.  According to Toby Hemenway, author of Gaia's Garden, they should be spaced 18 feet in areas with 40-50 inches of rain, and 50 feet in areas with 15 inches of rain.

The following images are of a larger swale system being built.  As you can see, the contour of the land typically creates a curved pattern across the land, NOT straight lines.  Rarely are there any straight lines in nature.

Larger swales following the contour of the land

Water harvesting in the swale

Here is a smaller swale system being established in a display garden:

The planted swale system at a display garden.
Note that the depression of the swale in this photo has been packed with straw.  This allows a more formal appearance to a yard (instead of standing water) while still retaining the water harvesting and storage capabilities.

In even smaller settings, you can create a Fish-Scale Swale.
Note that this swale will be filled with straw mulch and then covered with a thin layer of topsoil.  No one but the designer and the plant know the swale is there. Perfect for those who don't want a yard with "ripples" yet still want the benefit of the swale systems.

If you live in any area that does not receive regular rainfall and has weeks to months where no rain waters your plants, then I strongly suggest looking into Permaculture Swales.

Wednesday, June 22, 2011

Permaculture Projects: Lawn Care that Makes Sense

Organic Lawn Care: Lawn Care that Makes Sense

If you read my previous post on getting rid of your lawn, then you know I am not a big fan of lawns in general.  I am really not a fan of using tons of chemicals and spending hours of time on something that produces nothing.

With that said, I know that I am not going to convince everyone to replace their lawn with gardens and trees.  I also know that a patch of grass in the middle of a garden is pretty.  It is peaceful.  It can be nice.

But how do you grow a lawn without all the poisons and without spending all your free time maintaining it?  The following article explains how to do it.  It is written by Paul Wheaton.  He is a permaculturist who started the Rich Soil website and the Permies website (which has the largest Permaculture forum on the web).

Here is Paul Wheaton's great article on Organic Lawn Care for the Cheap and Lazy:
The key to the lawn care game is competition. You want to make things favorable for the grass and unfavorable for the weeds so the grass will choke out the weeds. Naturally...

Monday, June 20, 2011

Permaculture Projects: Outdoor Living Spaces

I could sit here for hours!

This is just a quick post to give you some ideas for Outdoor Living Spaces.  This is a trend that is starting to take off in newer homes and remodeling, but it has been a vital part of Permaculture Design for a long time.  We need to do everything we can to increase our time outdoors.  There are a lot of other benefits for being outside, but the direct Permaculture benefit is observation.  When we are outside, we have the ability to observe and interact with nature.  We gain a better understanding of the normal cycles of the natural world.  The more experience we have with nature, the easier it will be for us to mimic or use these natural cycles for our benefit.

This pergola is a great place to grow vining fruit like grapes (shown) or kiwi.
The deciduous vines give shade in the summer but let through warming sun in the winter.

An outdoor kitchen will increase your time outside.  
Plus with all the cooking heat outside, the home won't get too hot in the summer.

A beautiful outdoor fireplace.

A simple but classy back patio with fireplace and water feature.

A small fire pit at the edge of a forest... could be your forest garden.

A rustic bench in the corner of a garden.  Take the time to relax and enjoy nature!

A simple outdoor living space created with just a couple of chairs.